LAMPy Build Guide
Learn how to make a connected RGB lantern.
Overview
LAMPy is first and foremost a software project, meaning it can run on many different hardware implementations. The only hard requirements are an ESP32 board with an antenna, a WS2812 LED strip, and a push button. This guide explains how to handle power management and charging, but the codebase itself is independent of those features.
The proposed hardware build prioritizes simplicity and minimalism, which comes with a few trade-offs:
- Around 350 LEDs can fit on the enclosure, but the maximum output current is limited to 2 A. As a result, the LEDs can only reach about one quarter of their maximum brightness (which is largely sufficient in practice).
- The battery capacity is around 10,000 mAh, providing almost 5 hours of runtime at full brightness and likely days at low brightness. However, the charging current is also limited to 2 A, so a full charge takes a good 5 hours.
- There is no charging indicator, although this is not much of an issue if the lamp is charged overnight.
- There is no battery level indicator, so the lamp will shut down without warning once the battery is depleted (which is also not a major issue given the large battery capacity).
Parts Required
All required components should be readily available from electronics suppliers.
Links are provided for reference, but note that AliExpress listings do not always display the correct product variant.
- WS2812 5 mm "COB" 5V RGB LED strip
AliExpress
- Just over 2 meters required; buy 3 meters for one lamp, 5 meters for two, etc.
- Round and tall metal box with screw cap (42 mm x 102 mm (diameter is important for the LEDs alignement))
UK/EU supplier
- Three 18650 batteries with wires
UK/EU supplier
- XIAO ESP32-S3 with flat antenna
Official store
- Momentary RGB button (3-6V, 16 mm, with wires)
AliExpress
- Self-locking push button (8, 10 or 12 mm)
AliExpress
- MH-CD42 charging module
AliExpress
- USB-C socket, panel-mount screw type, 4 pins
AliExpress
- Transparent heat-shrink tubing, 50 mm diameter
AliExpress
- Hook-up wire
AliExpress
- Stripboard
AliExpress
Tools needed
- Soldering iron
- Power drill with assorted drill bits
- 5-16 mm reamer (with shank for drill mounting)
AliExpress
- Kapton tape or equivalent
AliExpress
Assembly
Follow these steps to make the lamp.
Prepare ESP32 module
-
Solder button wires to ESP32.
-
Cut and strip a short length of black and red wires, then solder them to GND and 5V pins.
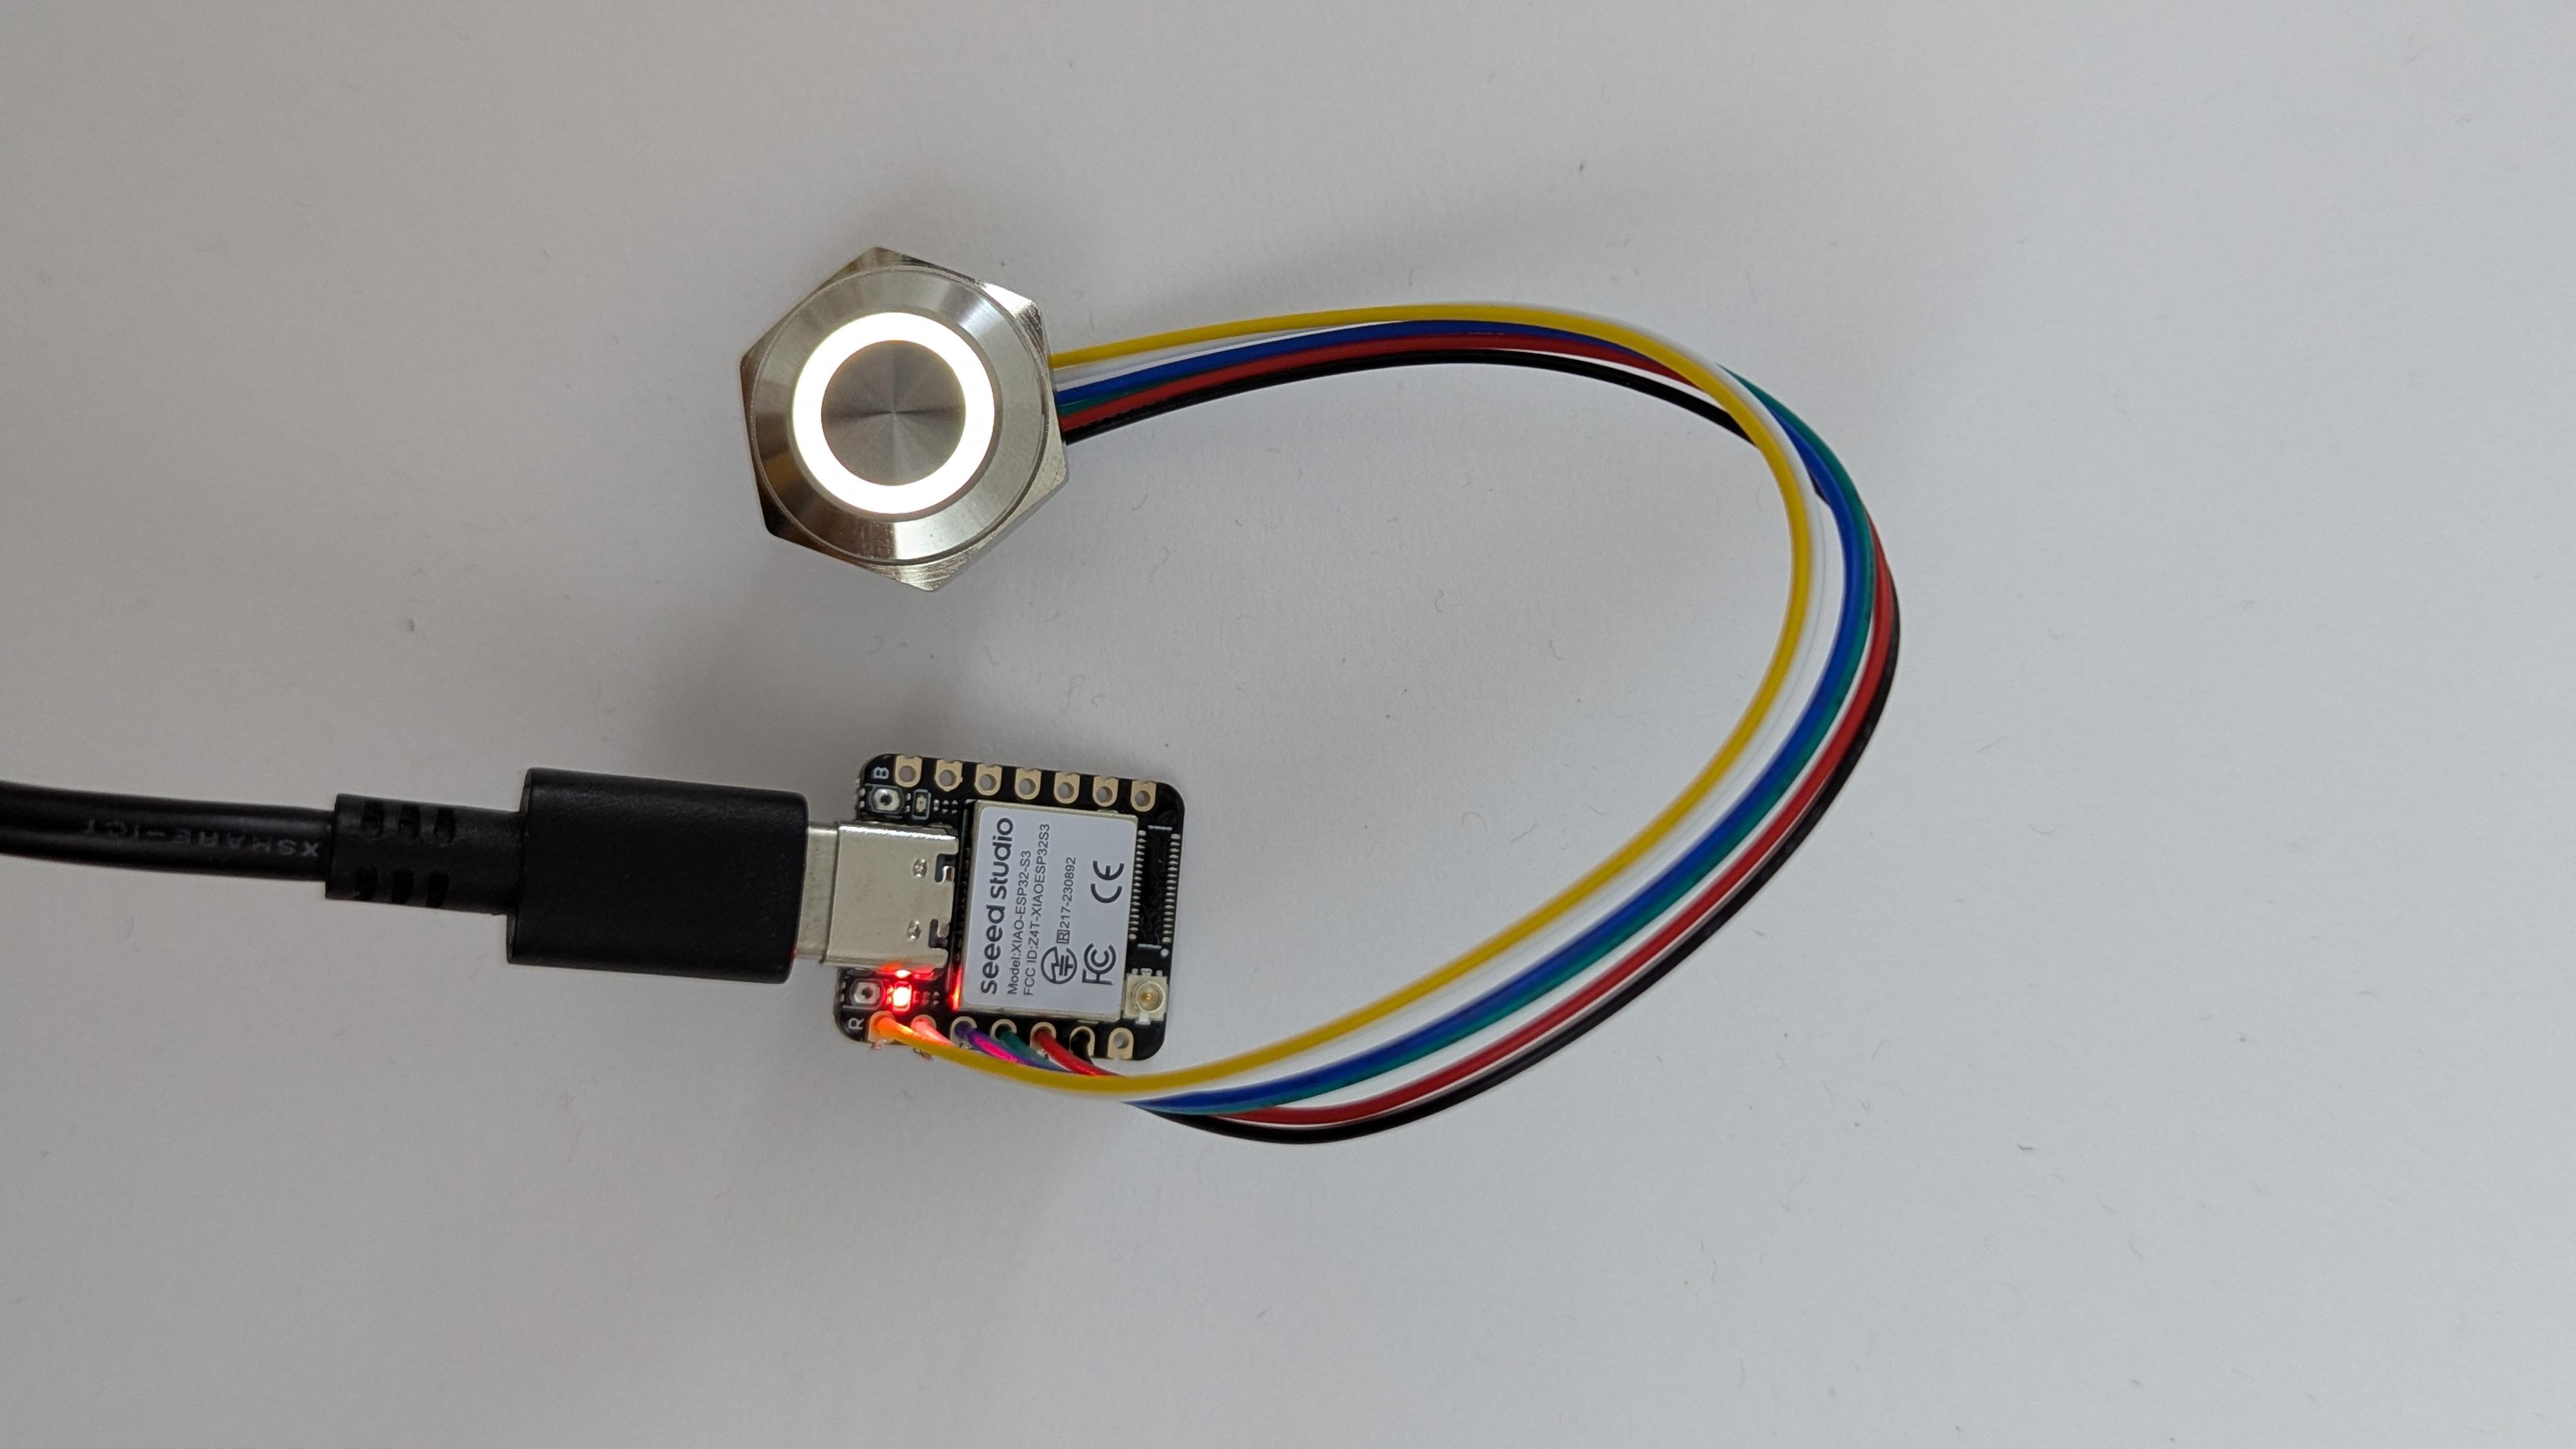
Upload the code to make sure the button lights up.
Make the tube
-
Using a drill, create holes at both ends of the box.
-
Add small pieces of tape to later insulate the box from the strip wires.
-
Attach the antenna to the box (the picture was missing, so only a drawing is provided below).
-
Wrap the strip around the box.
When done properly, the small LED bumps should form an almost straight vertical line.
Cut the strip once it reaches the opposite hole. To find out where to cut, take a look at the opposite side where the contact pads are visible. The cut should be made in the middle.
-
Cut and strip black and red wires, so that they are a bit longer than the box. Solder them to the exposed contact pads.
-
Pass the wires through the hole and make them come out of the box.
Make the cap
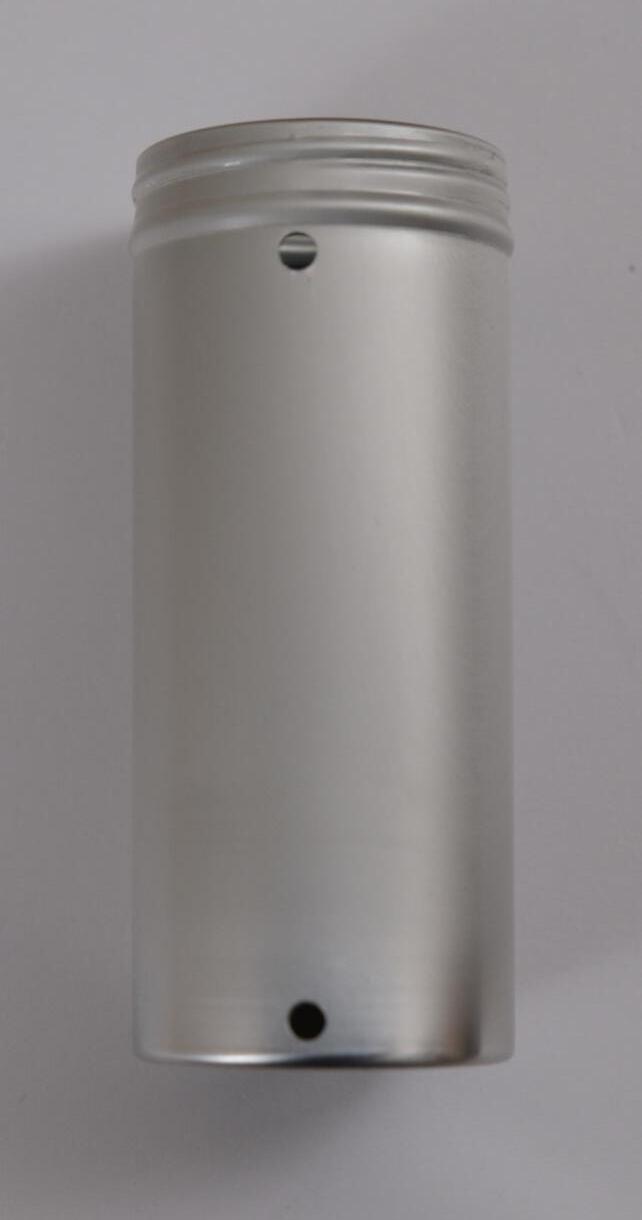
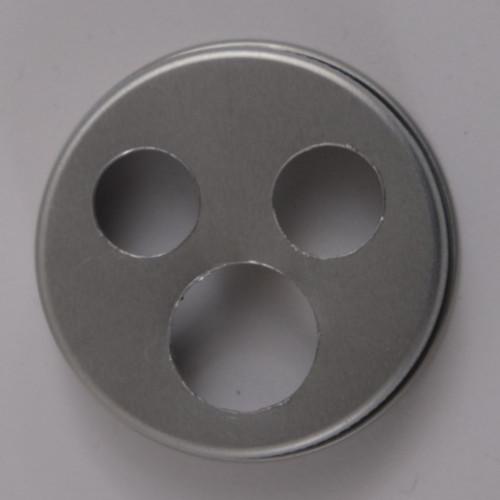
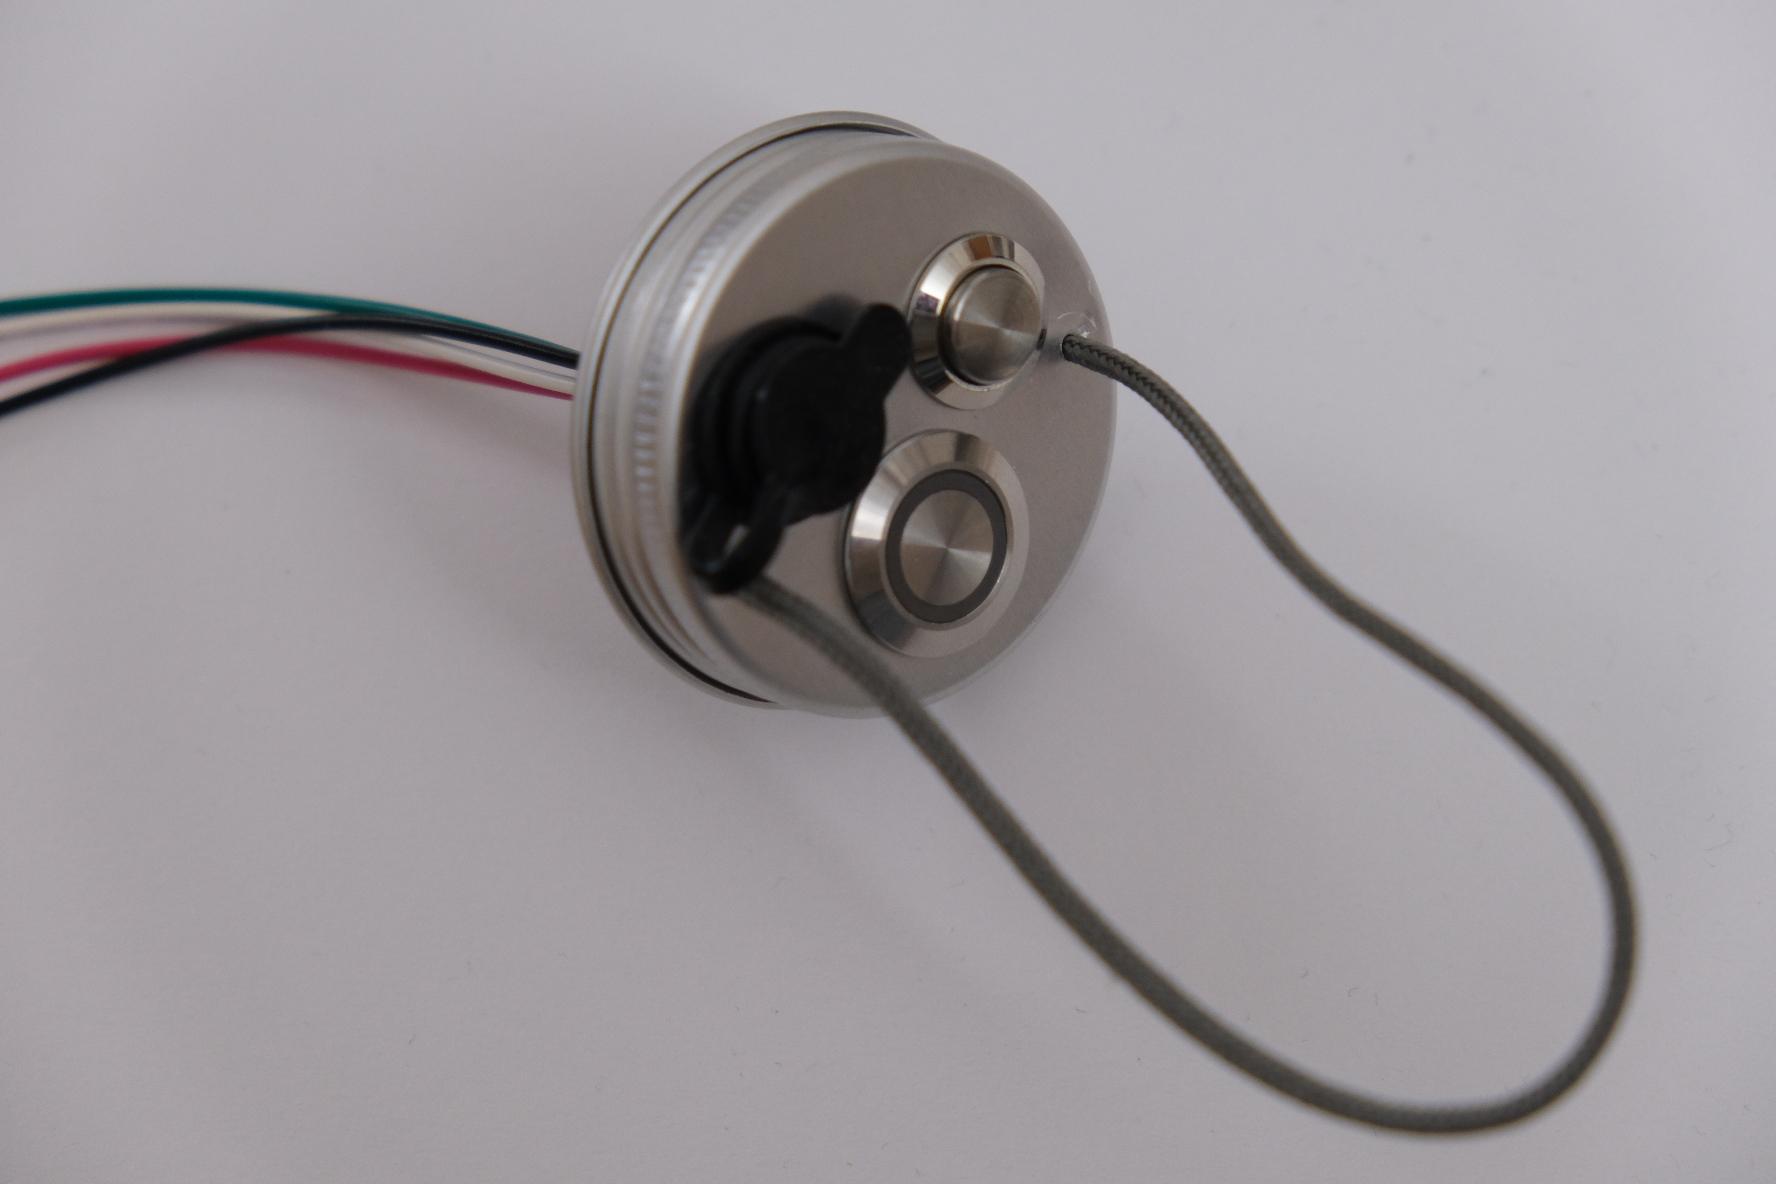
Cap will hold two buttons, a USB socket and an attachment cord.
-
Draw some marks to indicate where to drill.
-
Using a drill, make the three holes.
-
Using a reamer, widen each hole to match button sizes.
-
Drill small cord holes on each side of the cap.
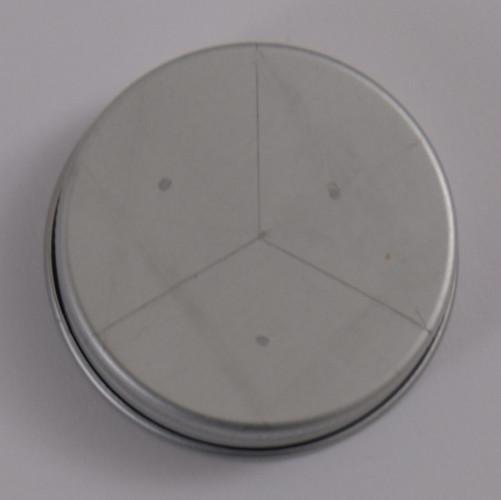
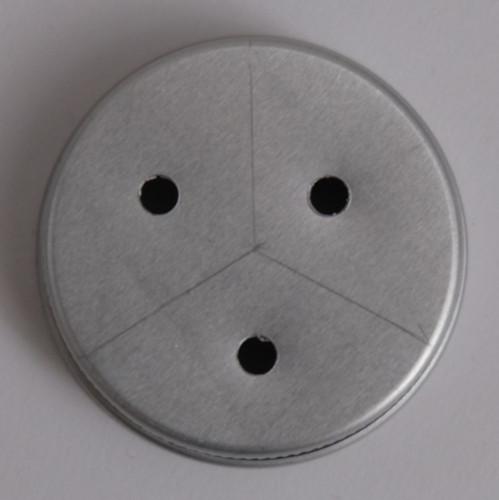
Screw the buttons and add the cord, securing it with knots on the other side. Lightly melt the cord ends to make them easier to pass through the holes.
Optionally add a tiny bit of glue to the cord base, for waterproofing and for preventing the sharp metal edges from damaging it.
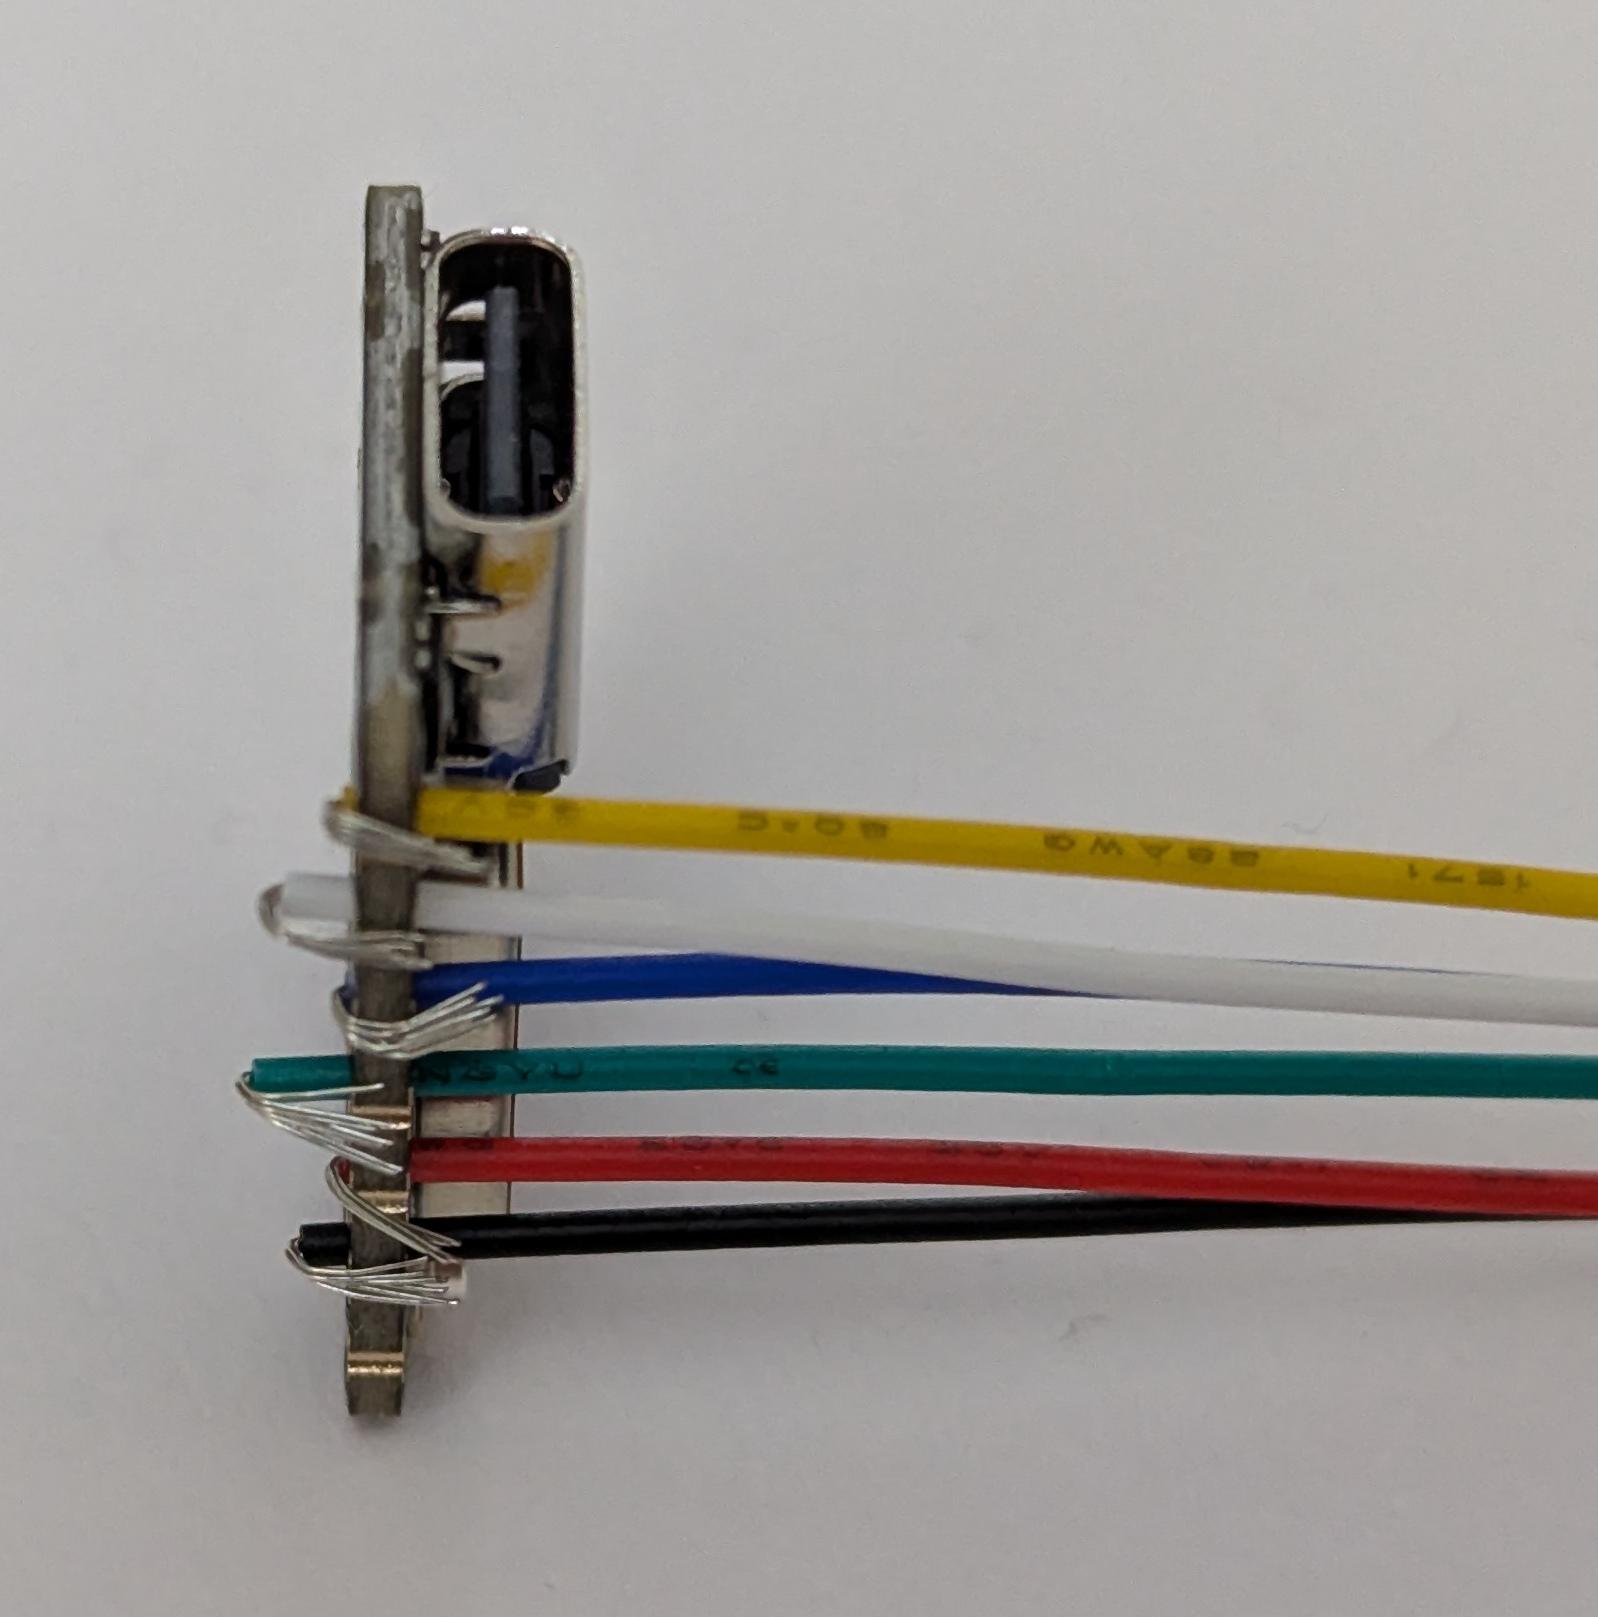
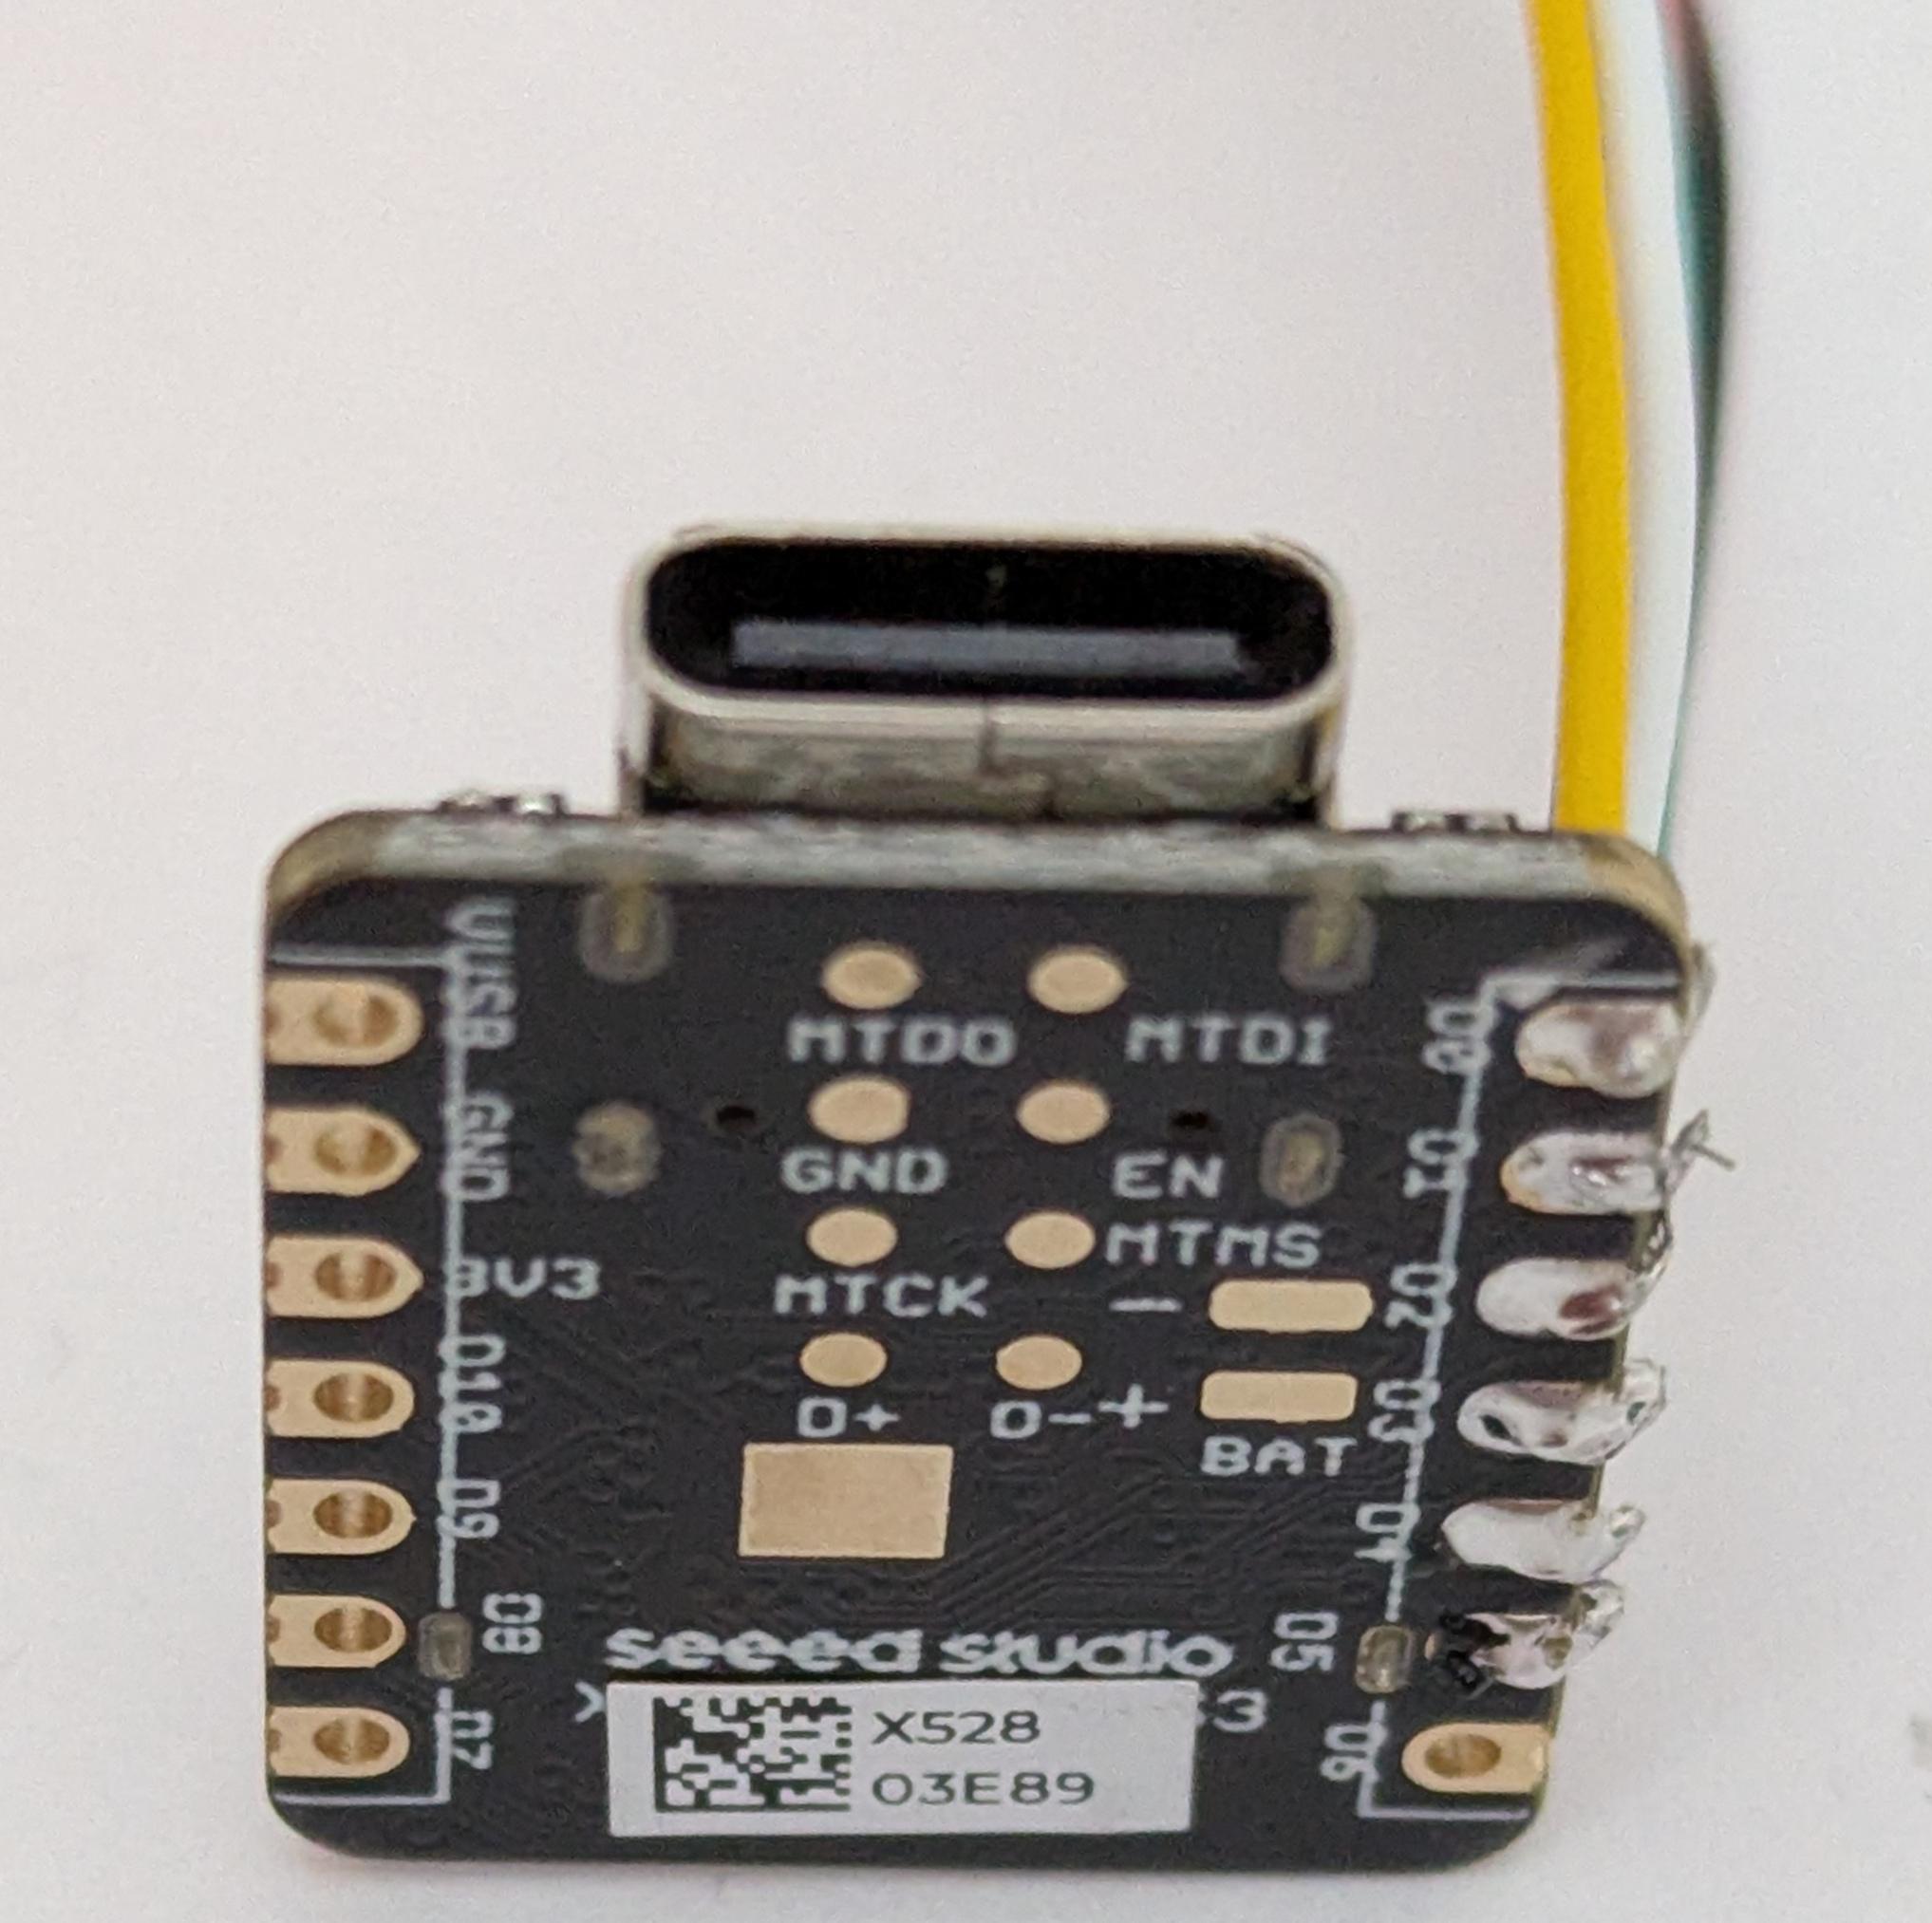
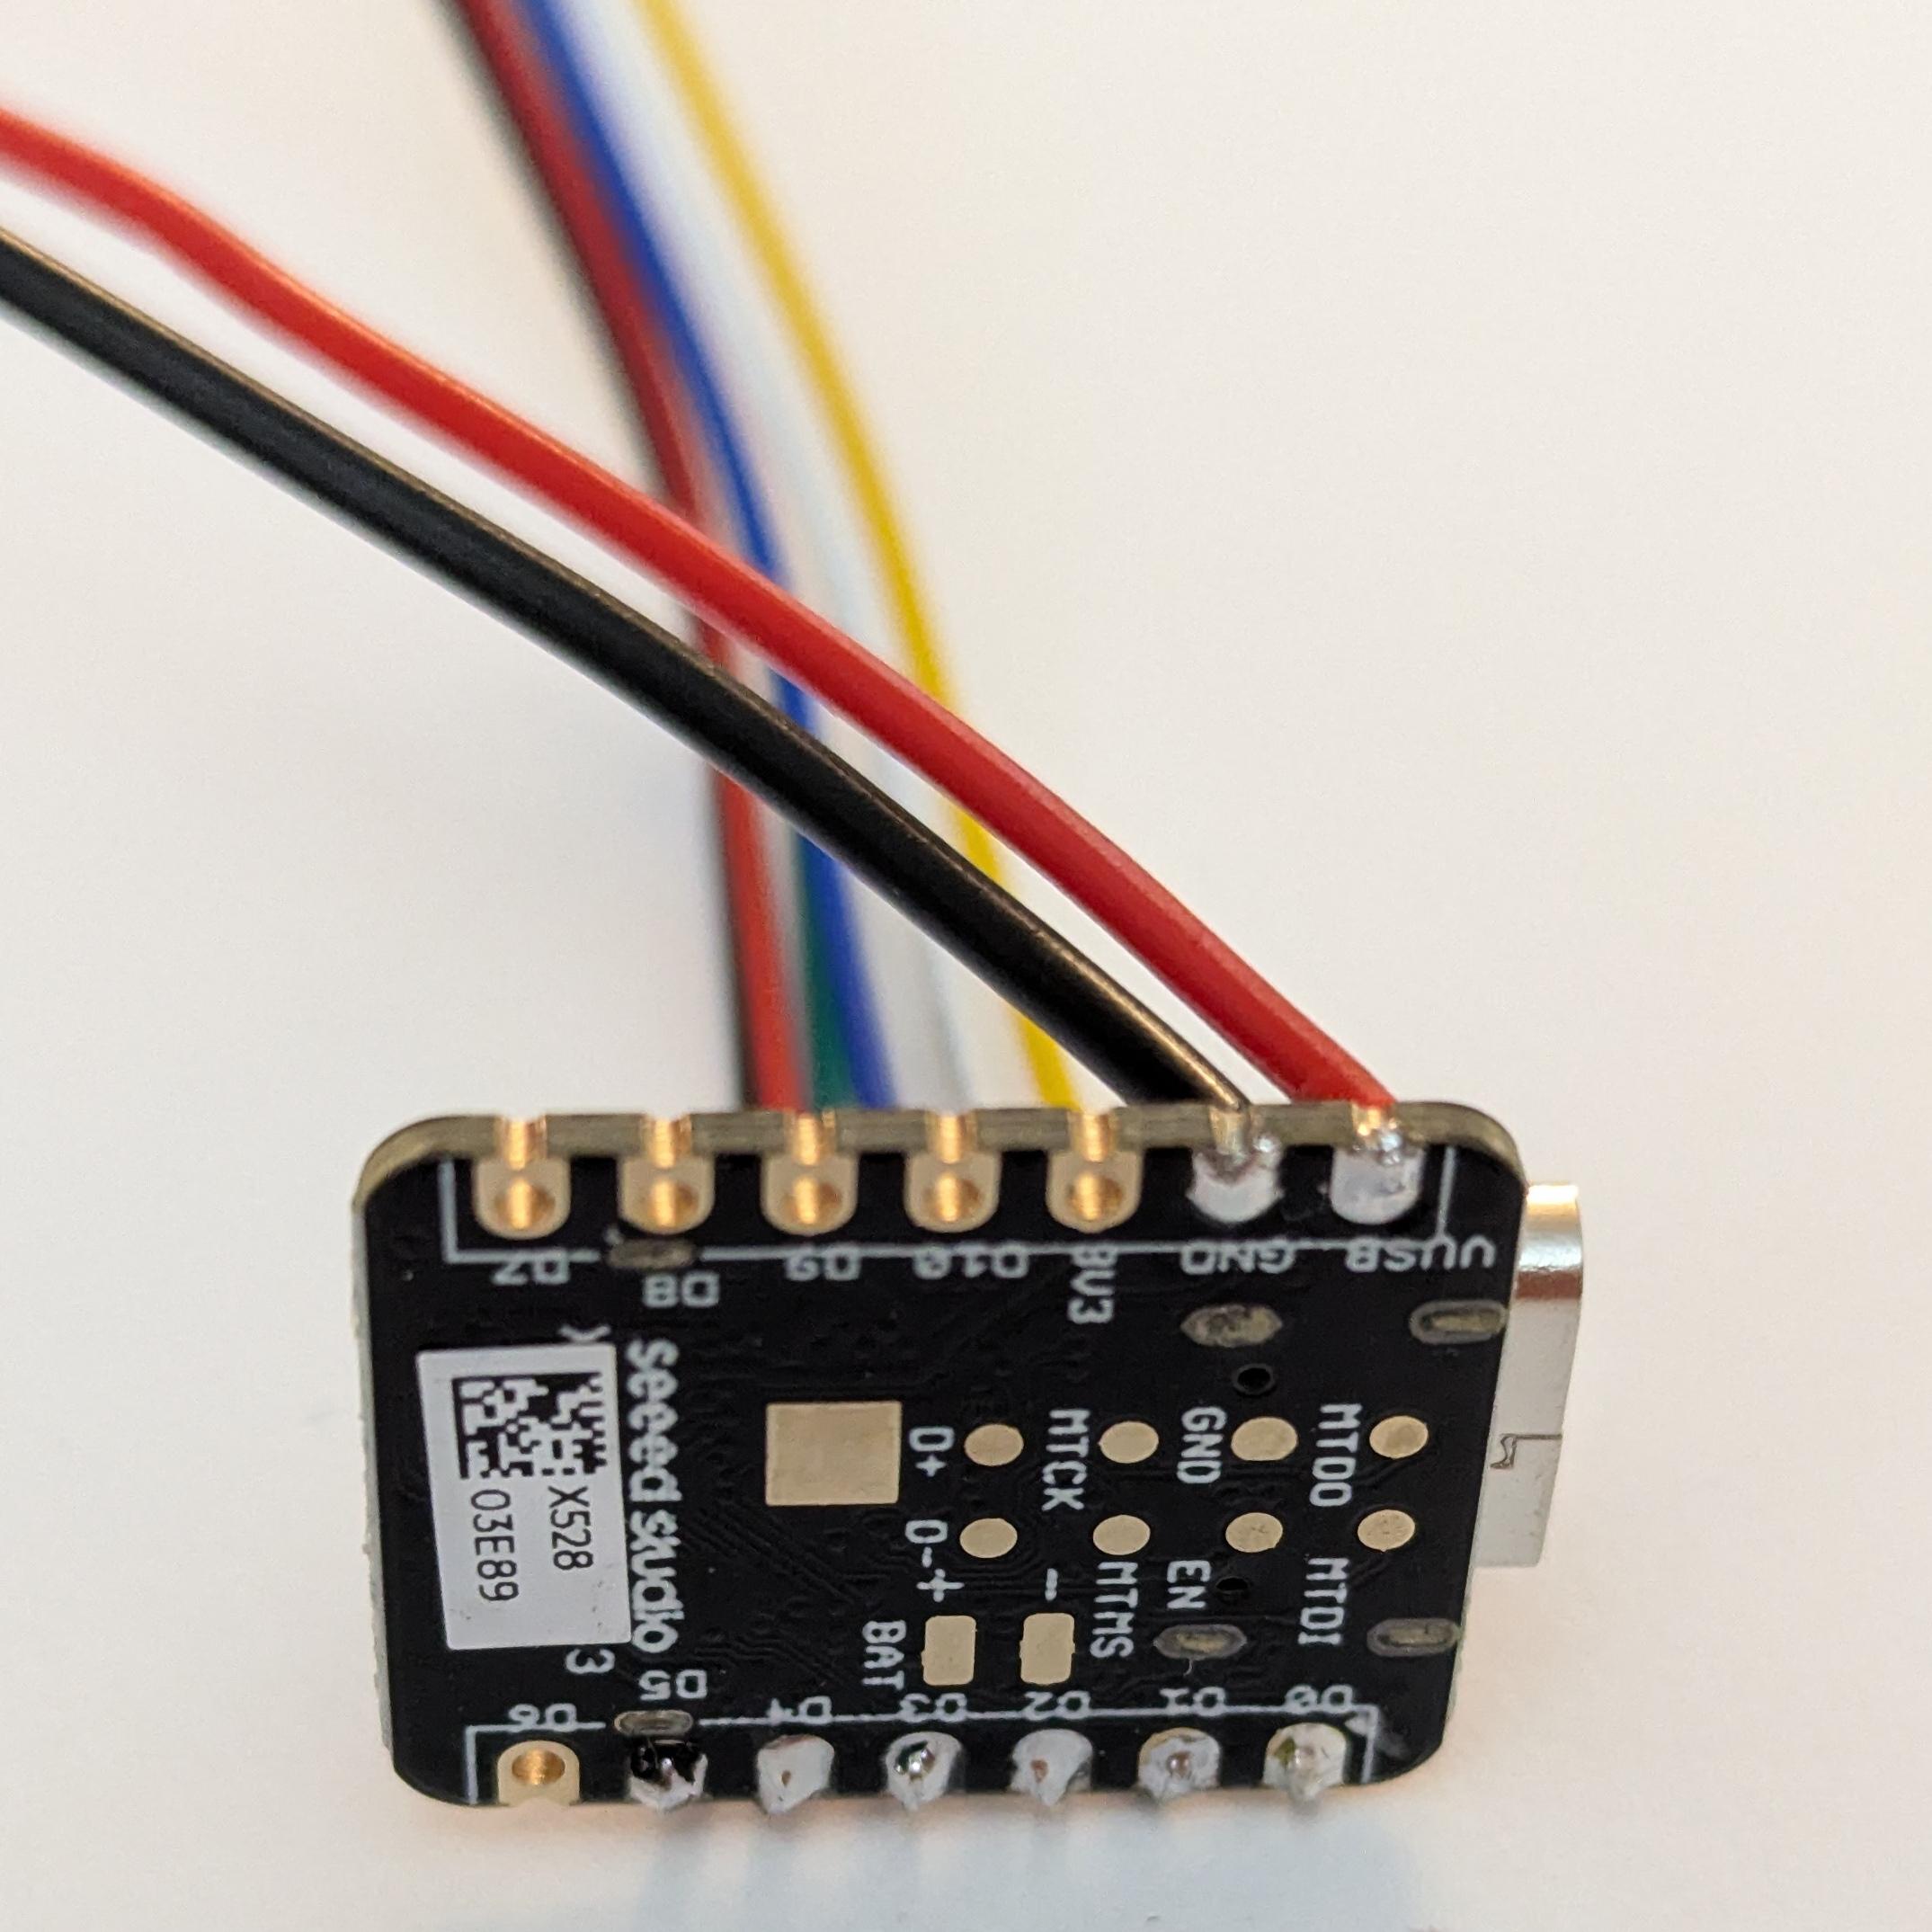
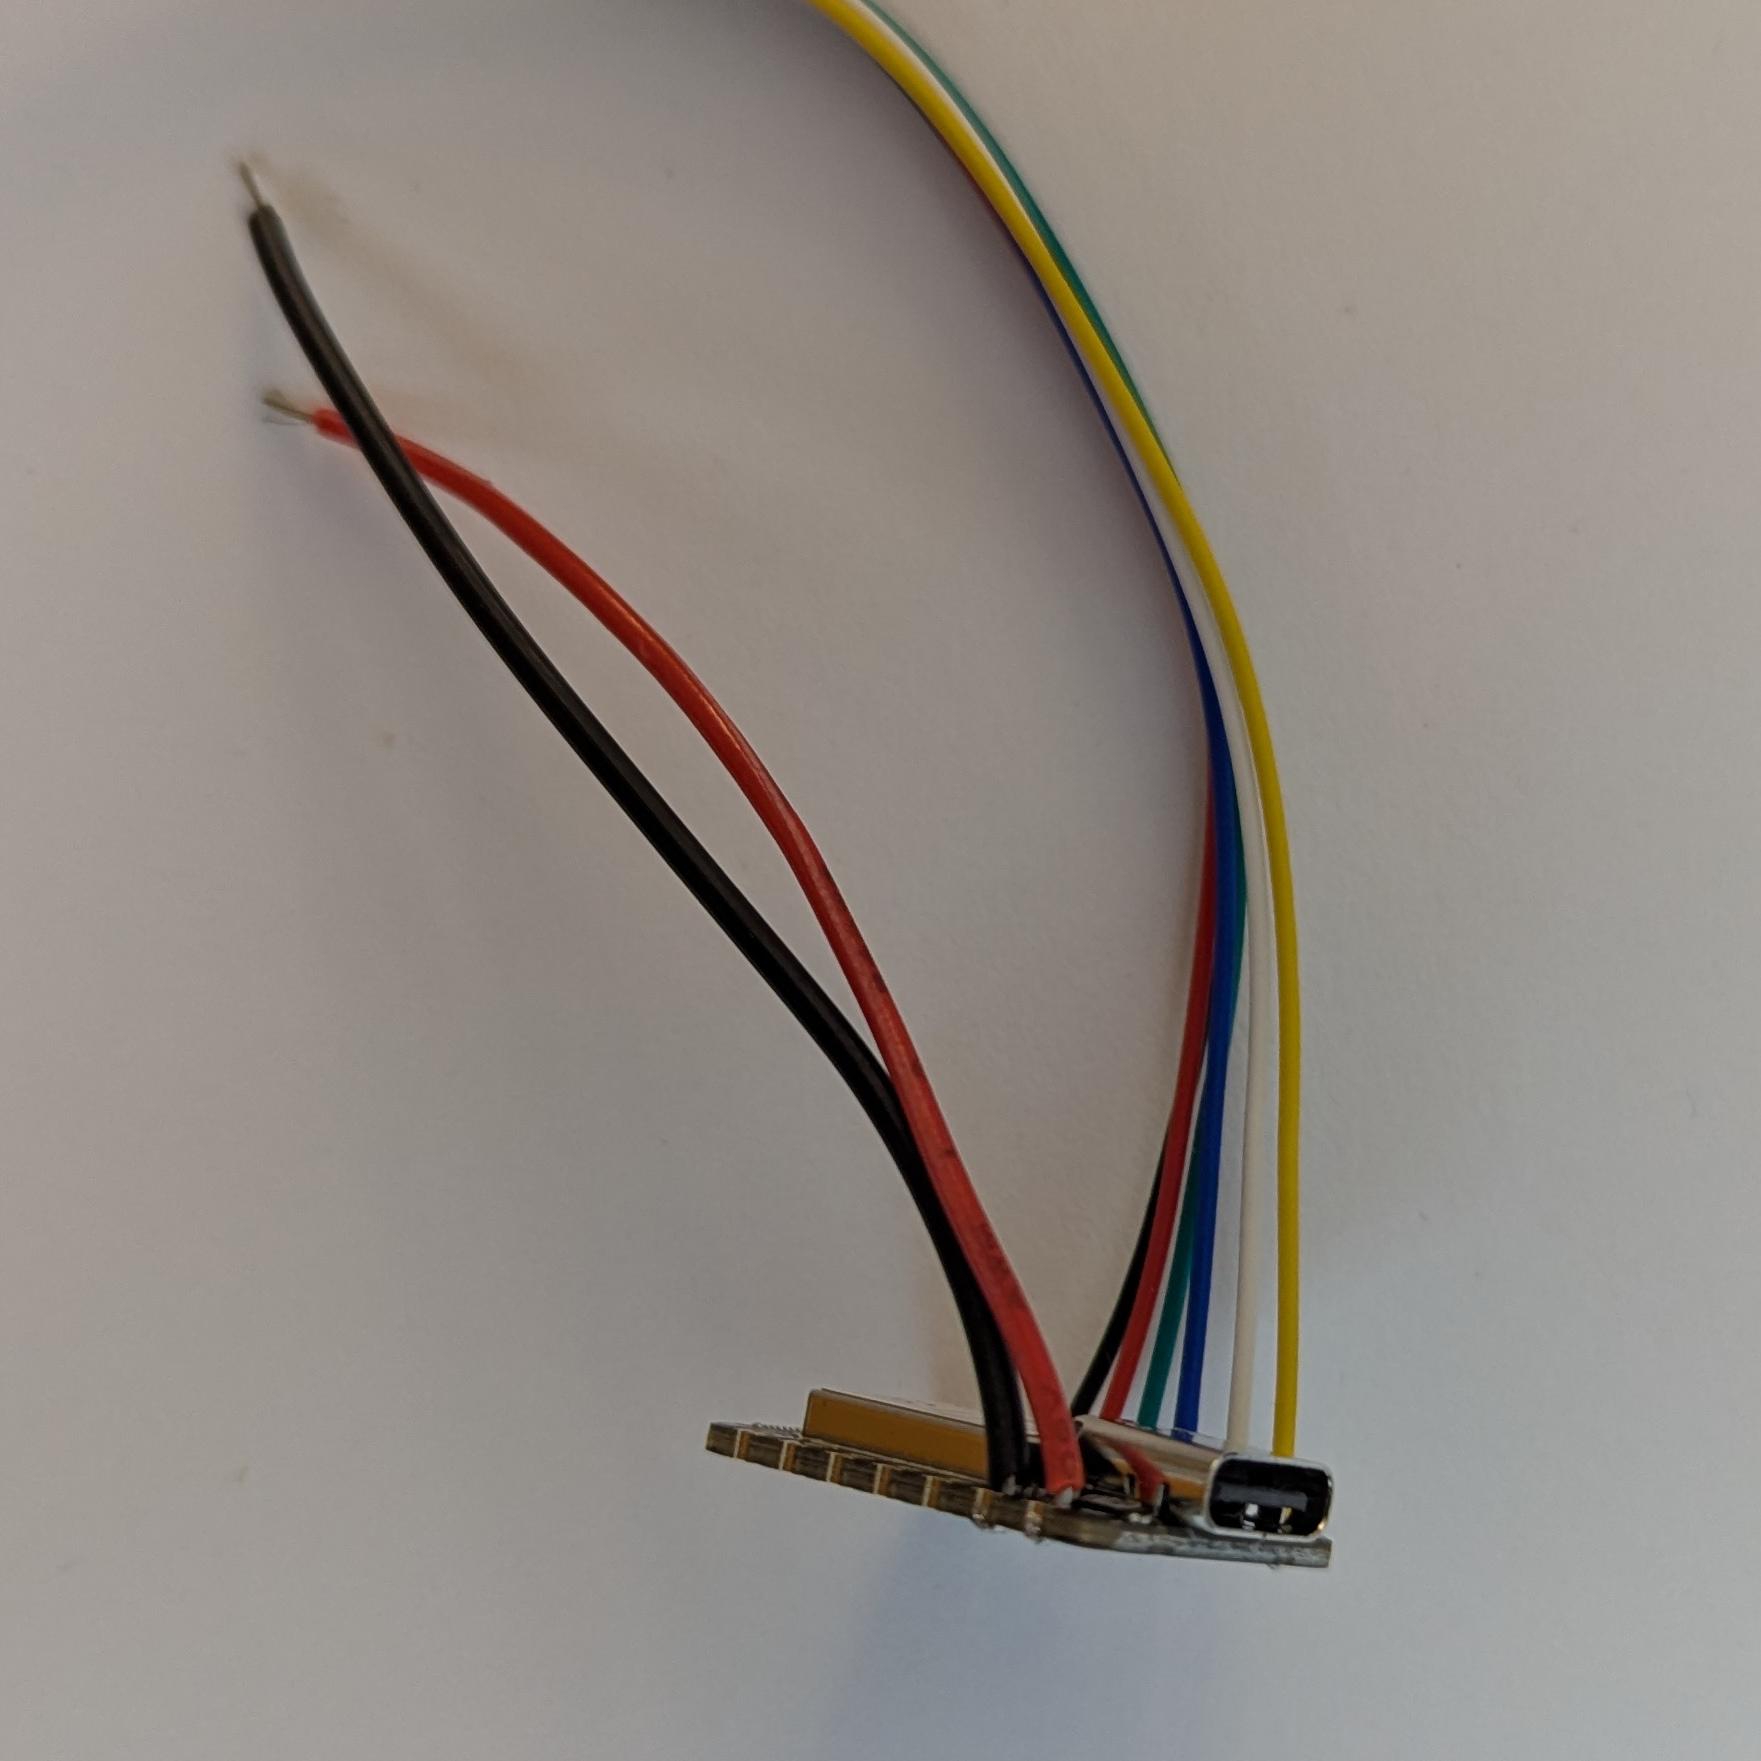
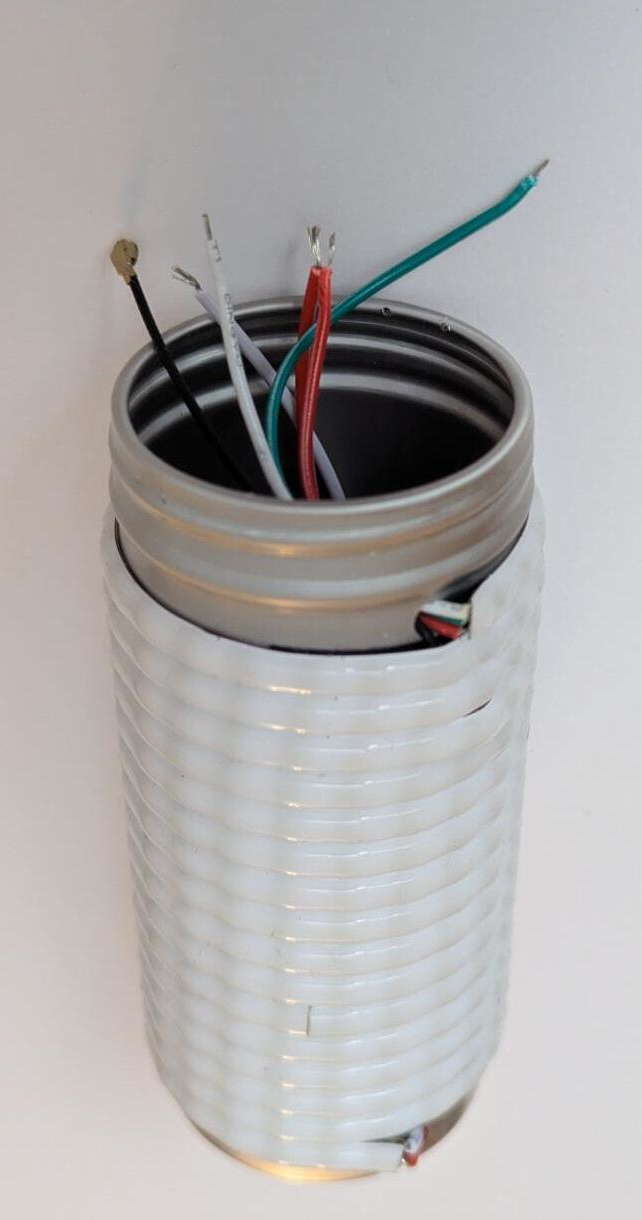
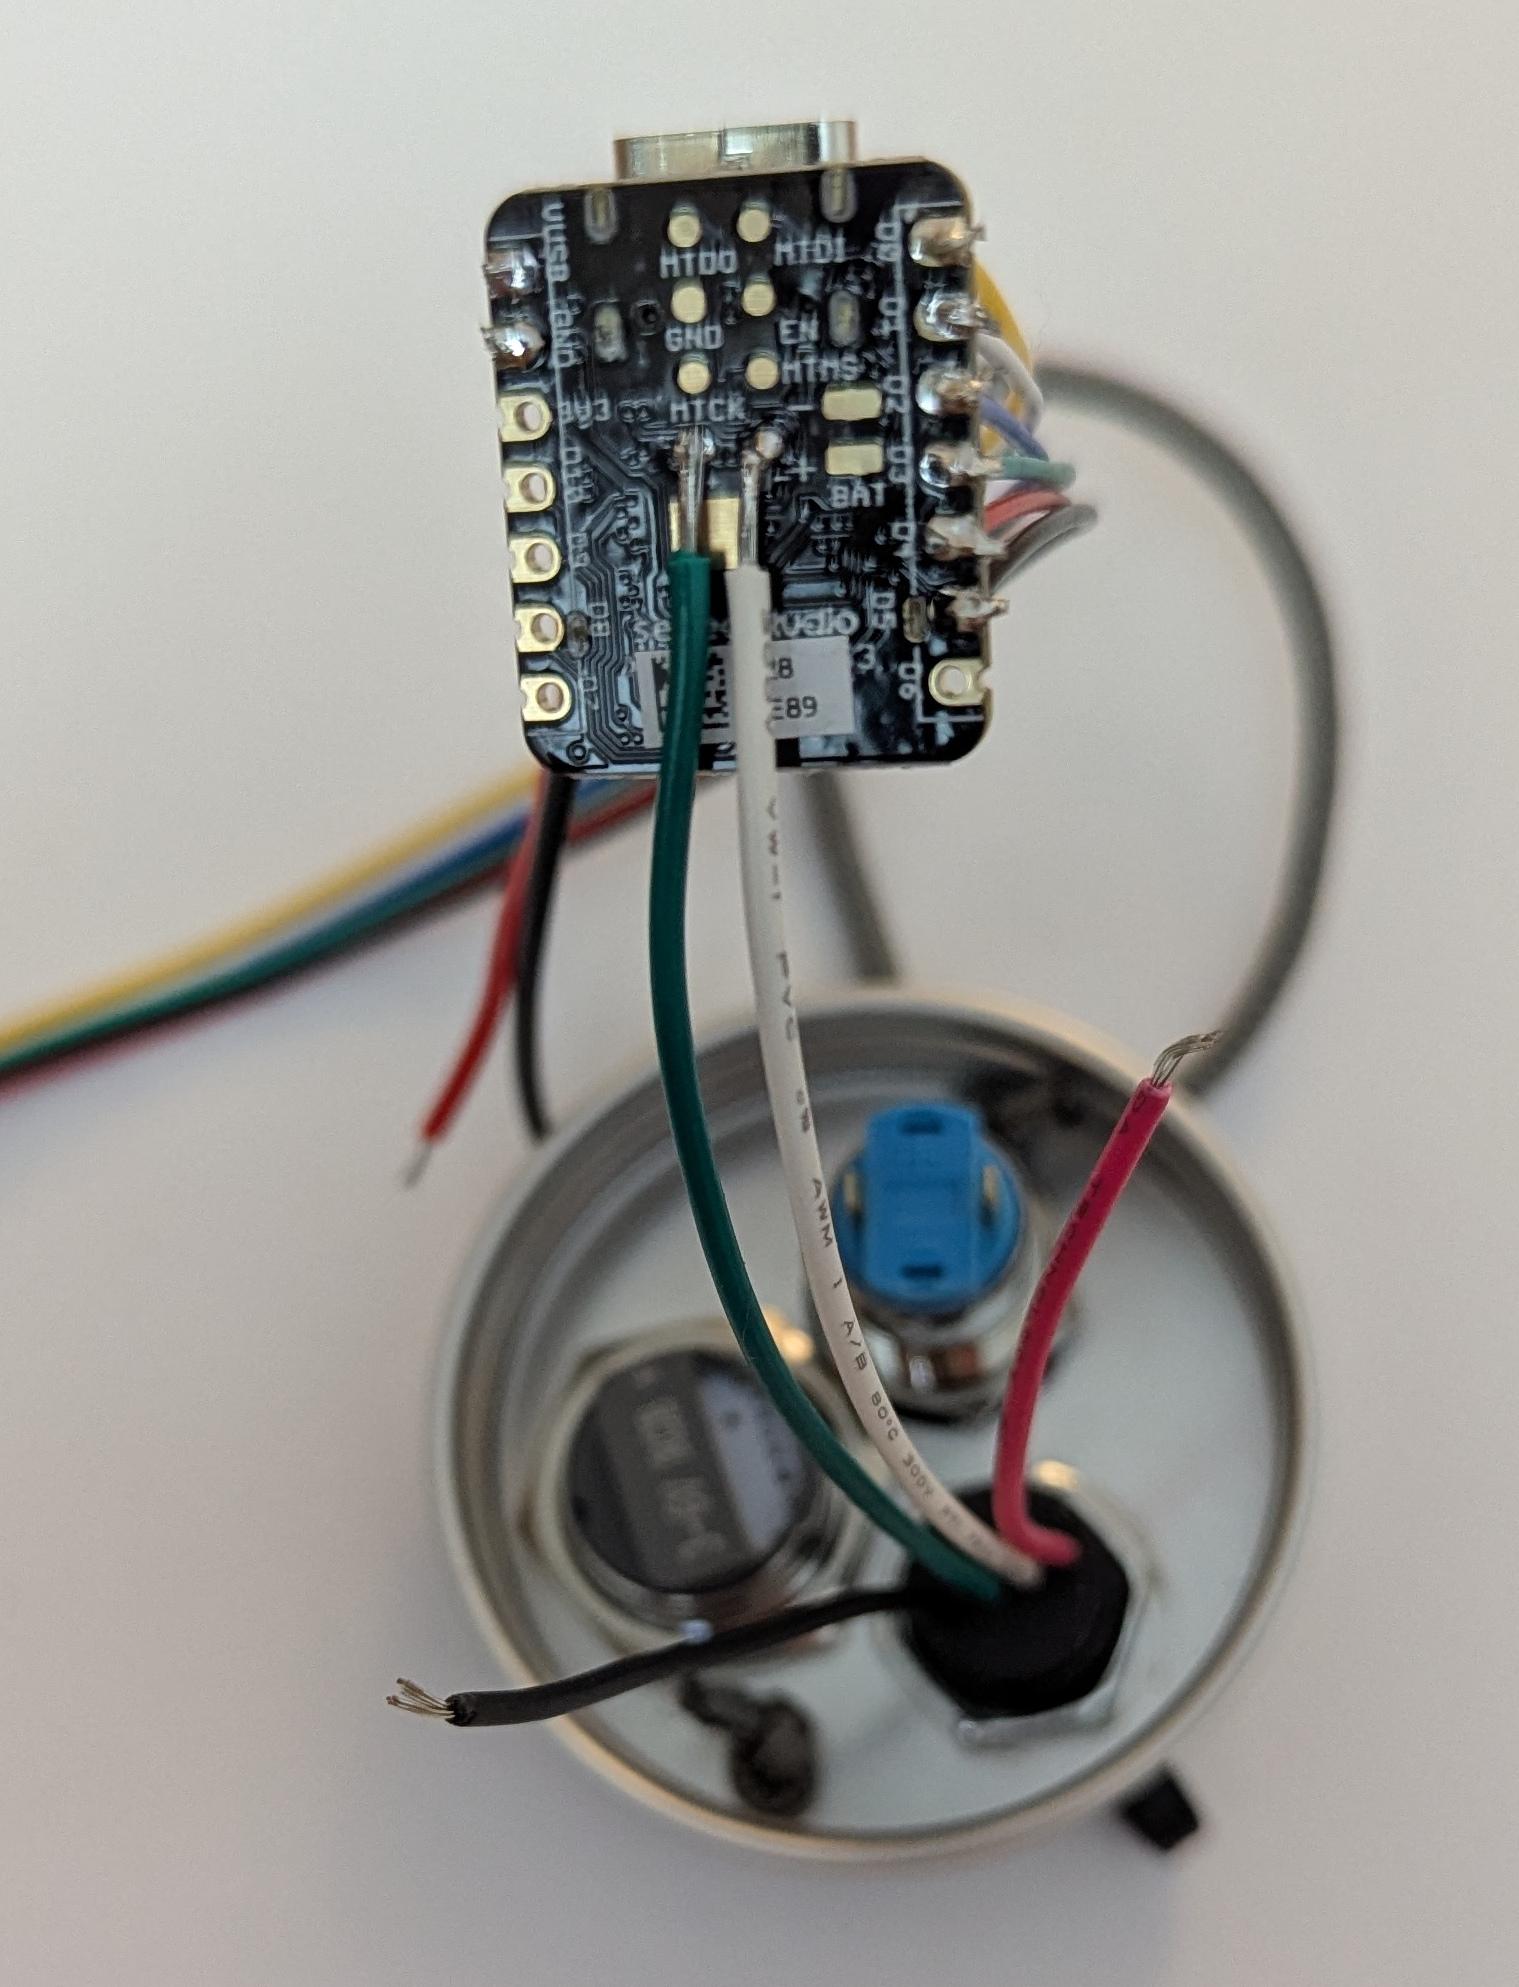
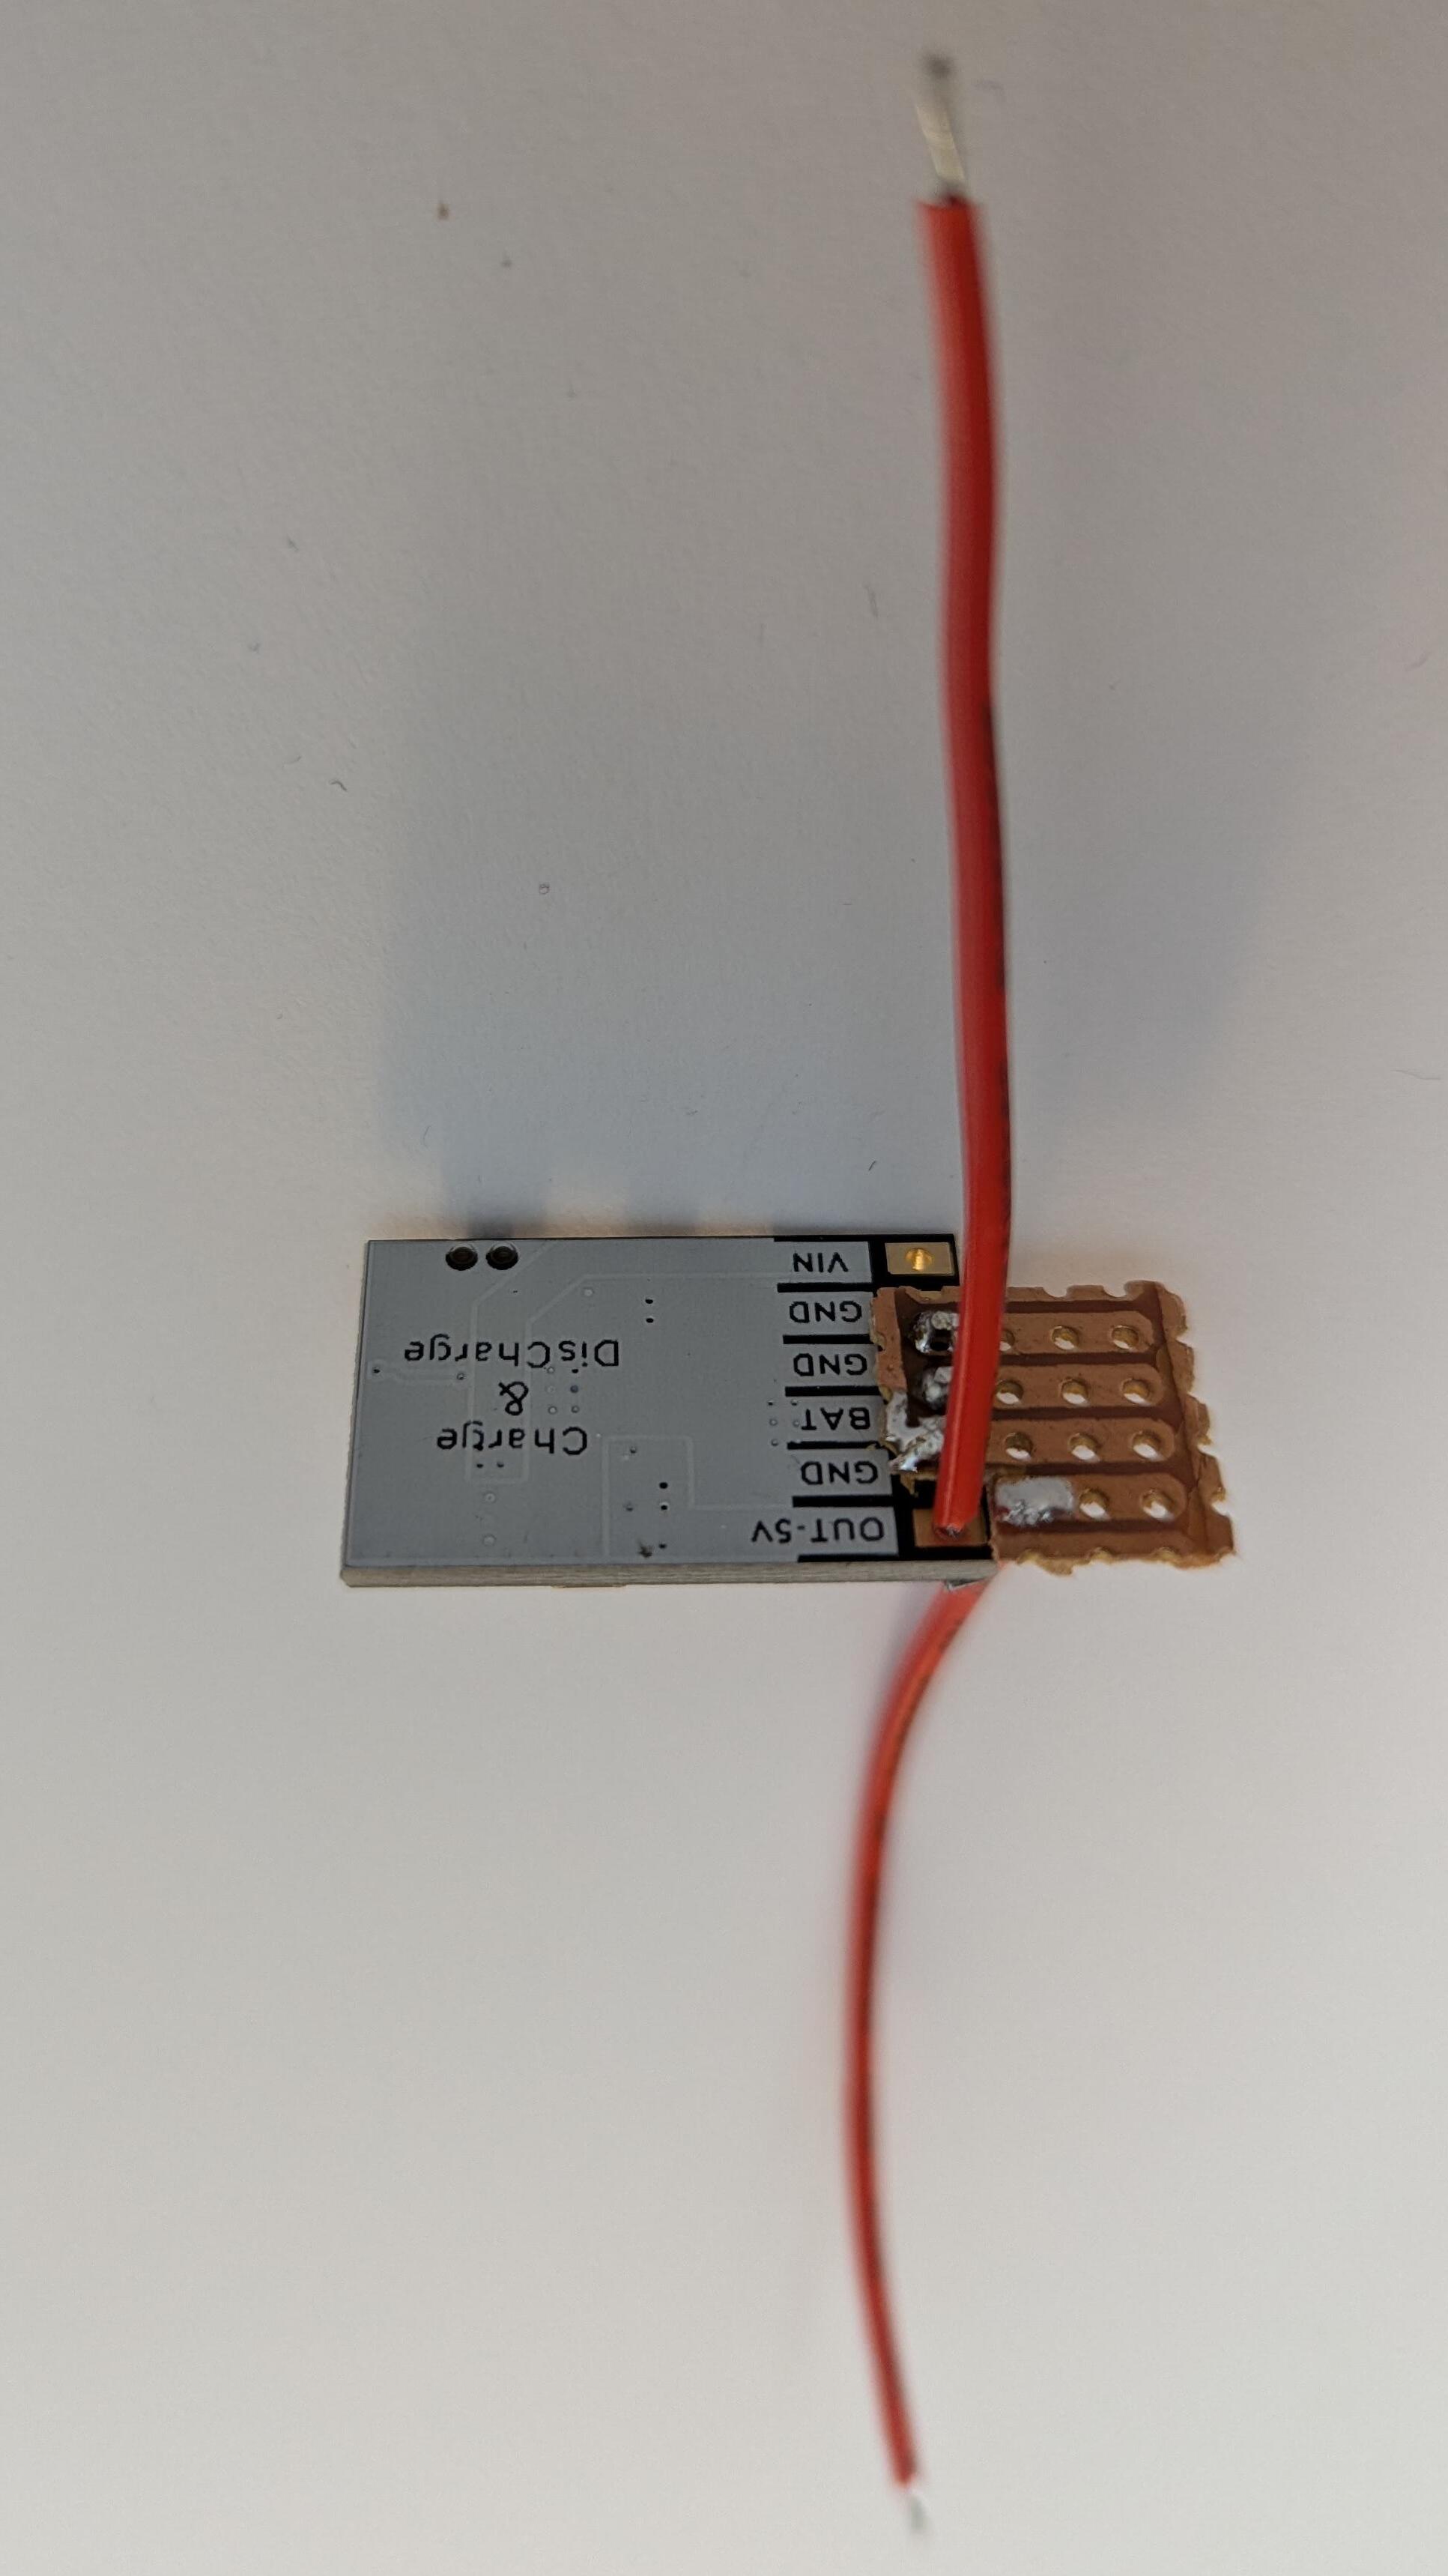
Shorten USB wires, leaving more length for data wires.
Solder data wires to ESP32 data pins. Then glue the wires to the board, to avoid direct strain on the soldering pads, which can rip off easily.
Prepare the battery module
-
Cut a piece of perfboard according to the picture.
-
Solder header pins to the charging module.
-
Using pliers, remove the plastic spacer from the header pins.
-
Solder the perfboard piece and trim the pins.
-
Solder two wires: one to the module's 5V output and one to the adjacent perfboard hole.
Solder parts to the charging module
-
Solder the strip power wires to the perfboard, next to the 5V output pins of the charging module. Twist the positive wires together so that they fit in one hole.
-
Solder USB socket power wires to charging module input pins.
-
Solder charging module output wires to the power button.
Add ESP32
-
Solder the strip data line to the ESP32 (pin 10).
-
Solder the ESP32 power wires to the remaining perfboard holes.
Add batteries
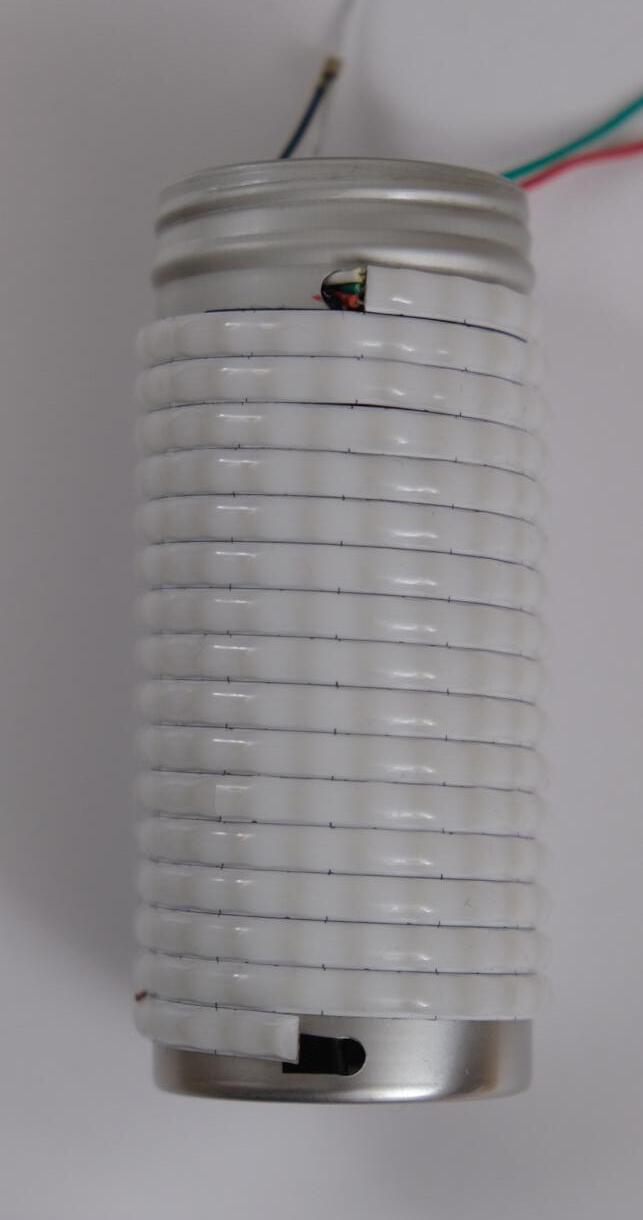
Tape batteries together in a triangle shape.
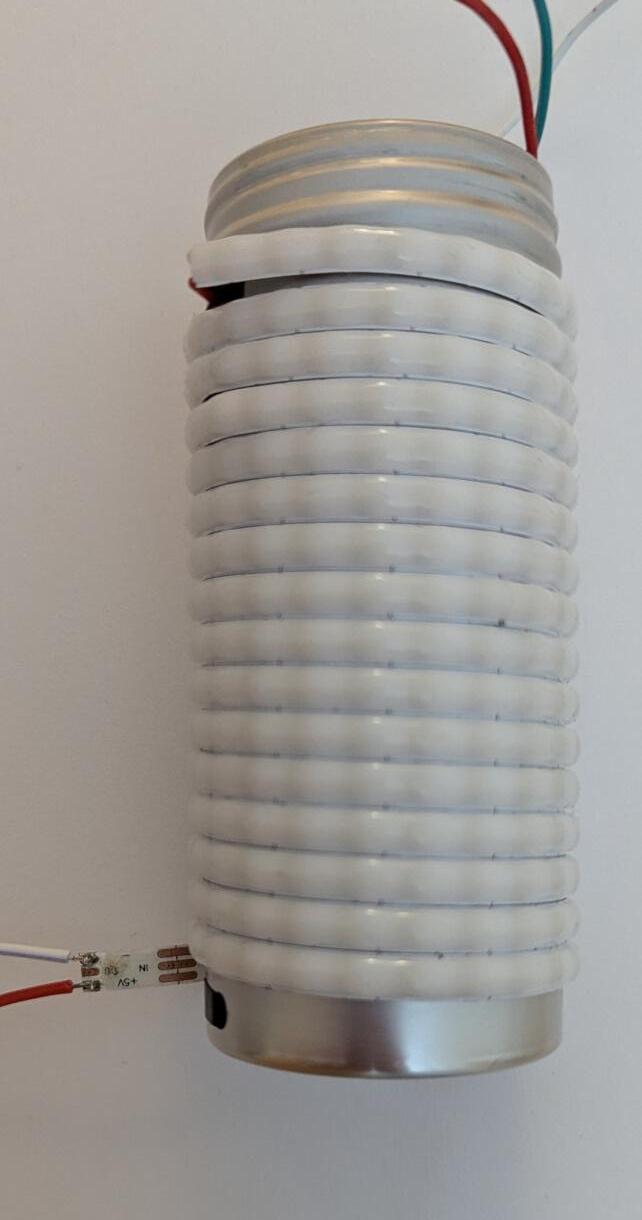
Insert batteries inside the tube. This will require a bit of pressure since the fit is quite tight. Bending the opening of the tube a little is fine, as it is easy to reshape afterward.
To prevent batteries from moving from side to side, add something to hold them in place, for example a piece of tape rolled onto itself until thick enough (however, this has sometimes proven not to be enough if the lamp is shaken hard enough, so use your imagination to get a stronger hold if needed).
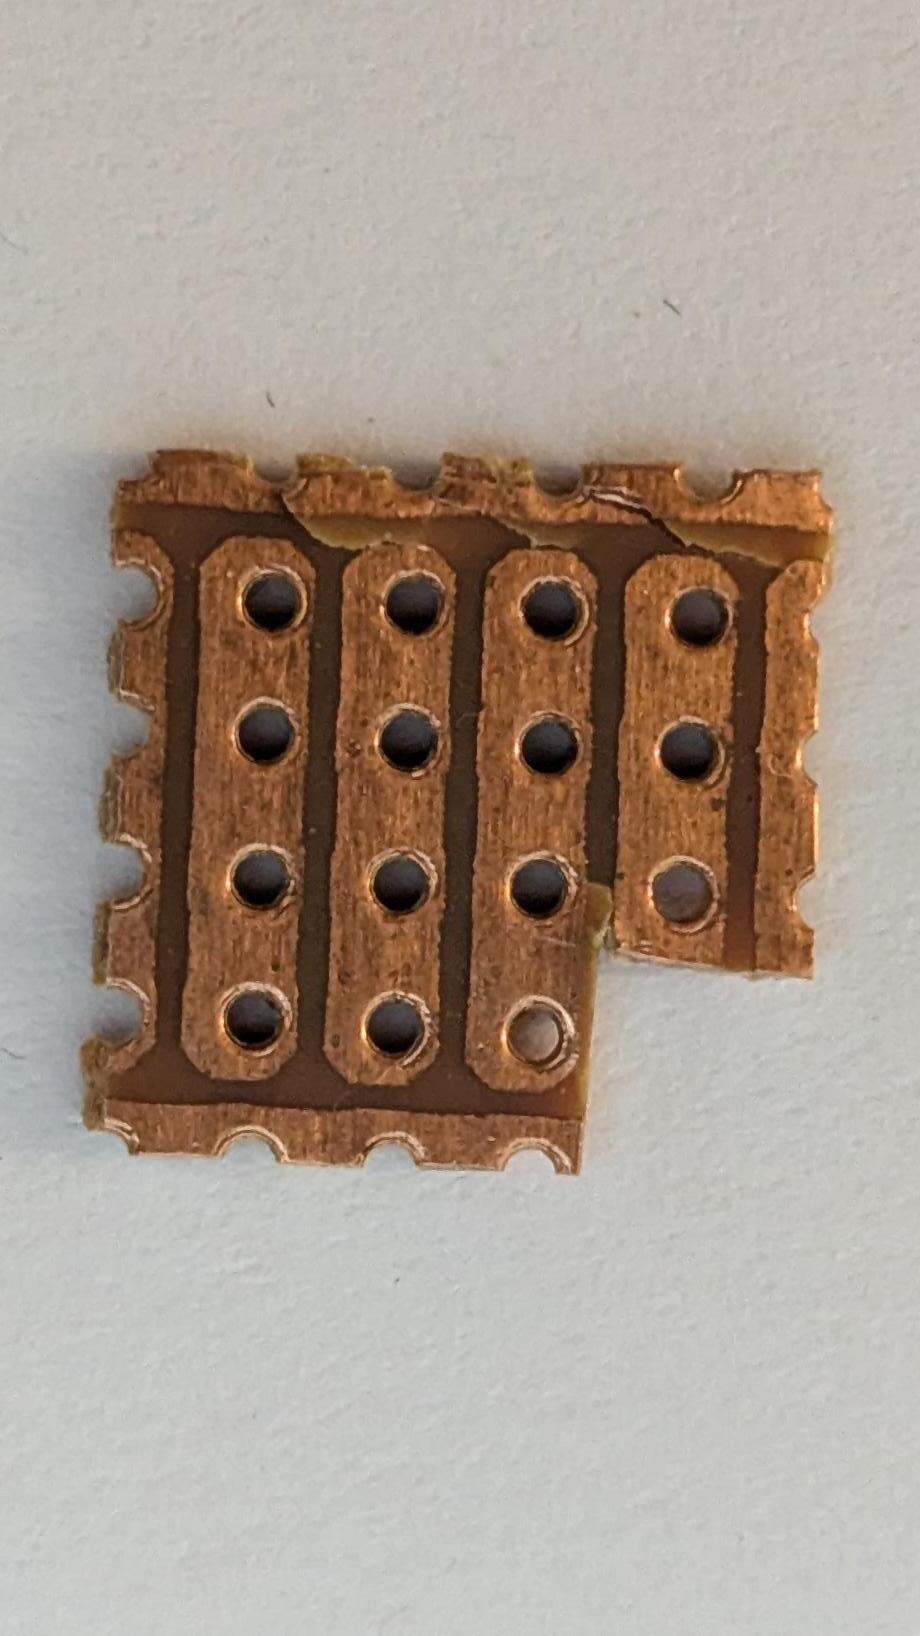
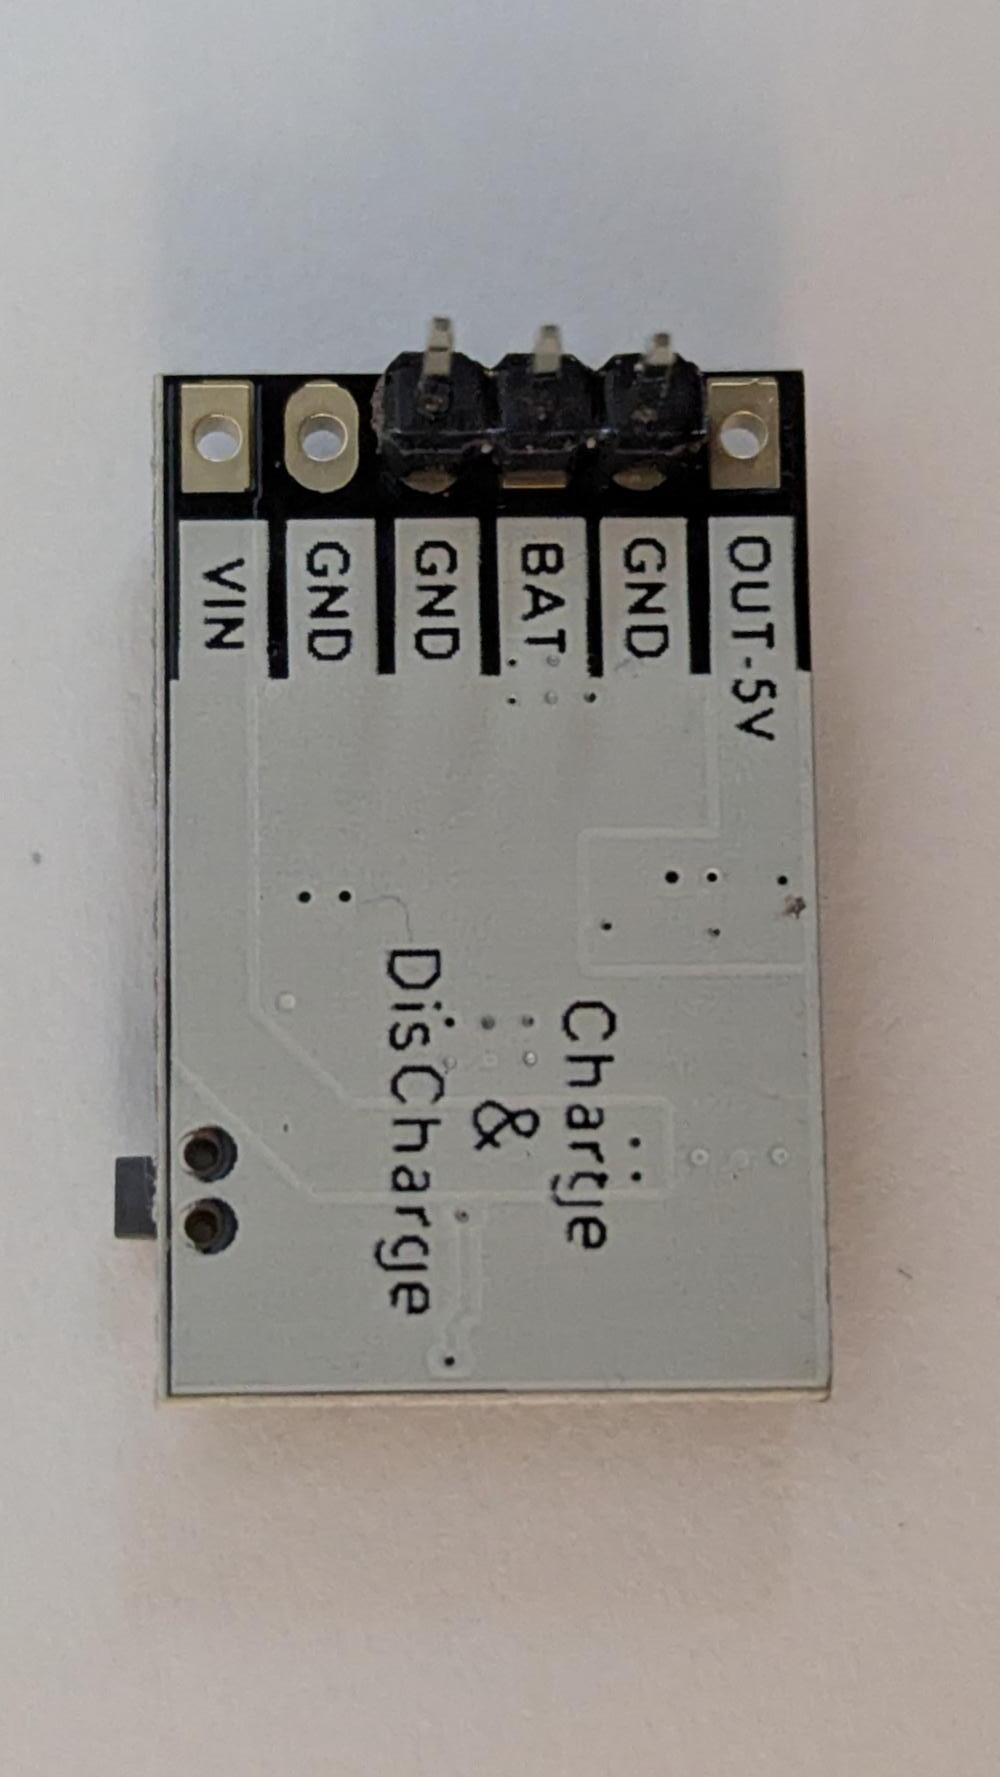
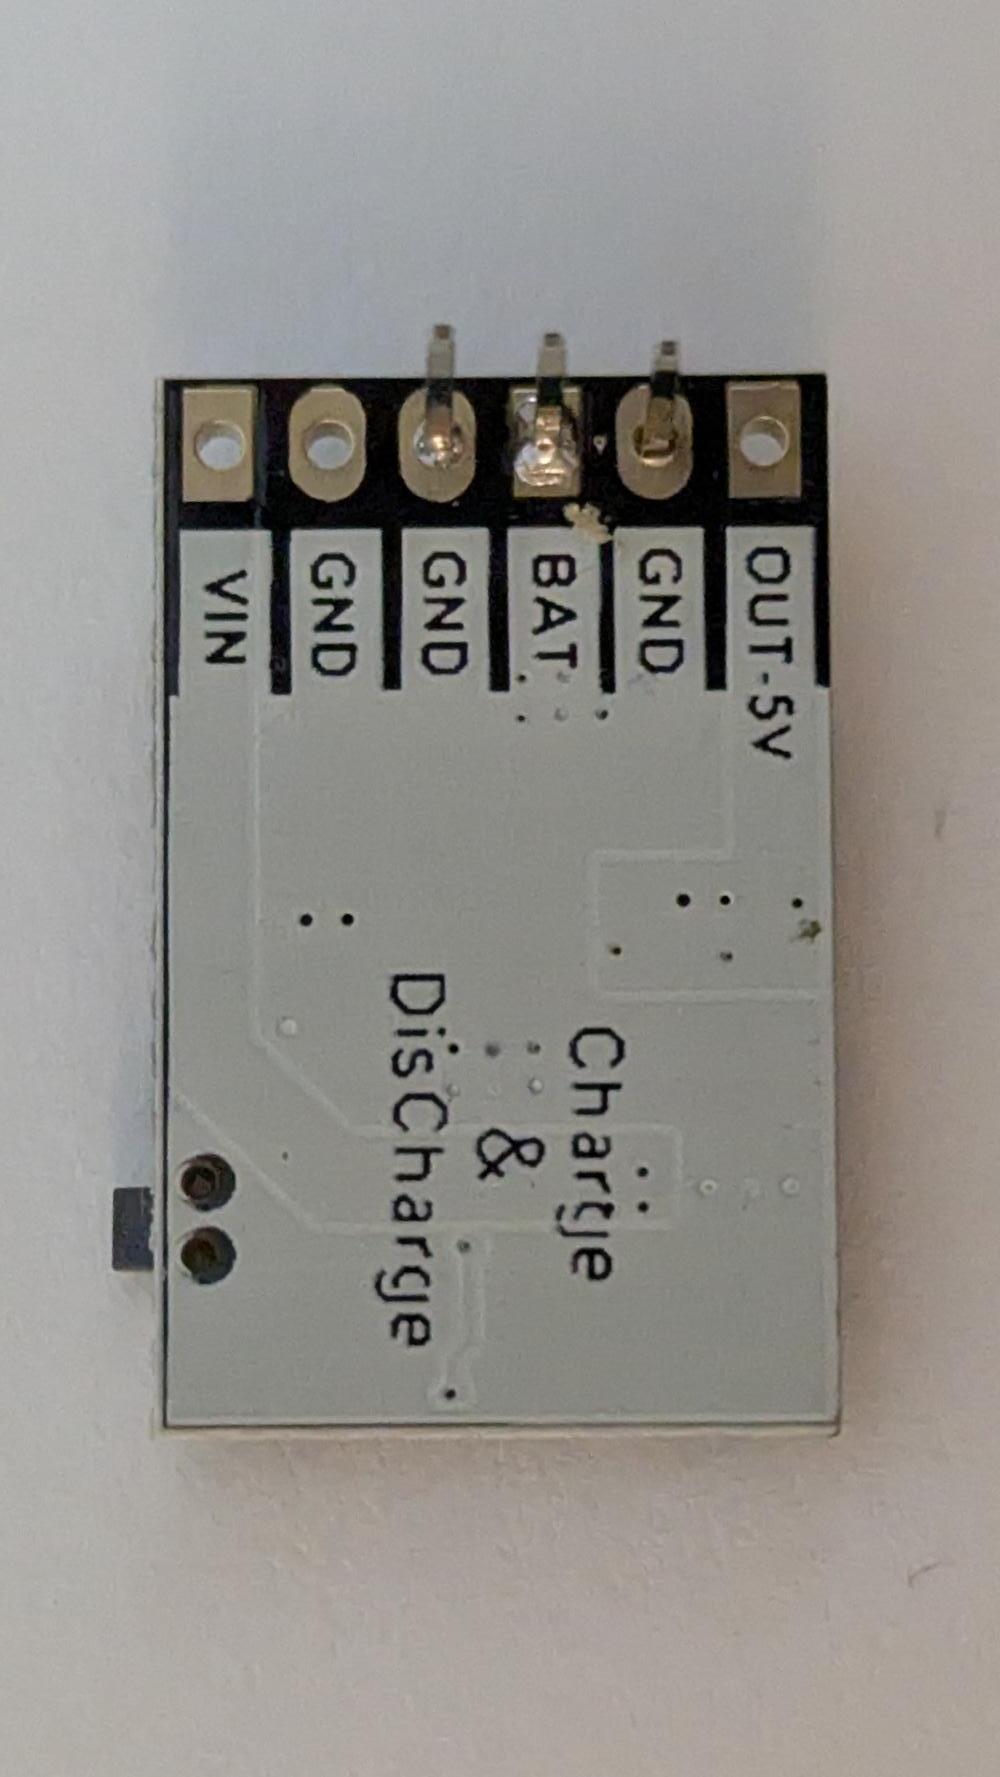
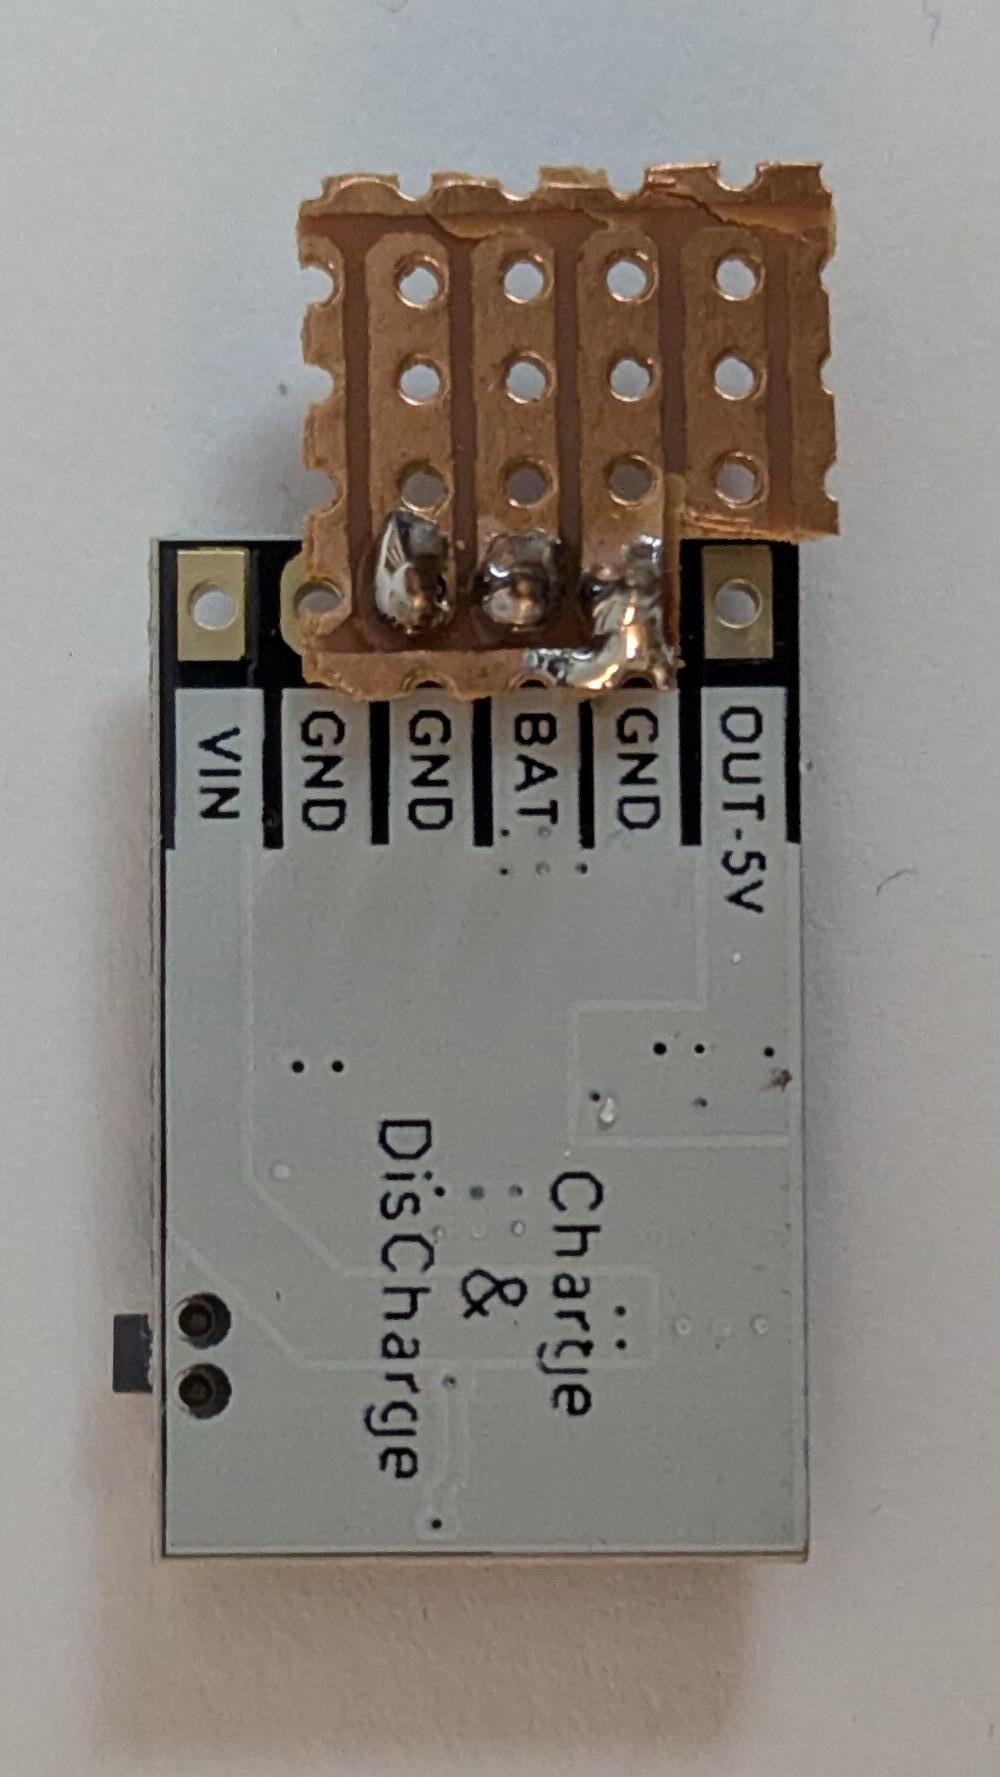
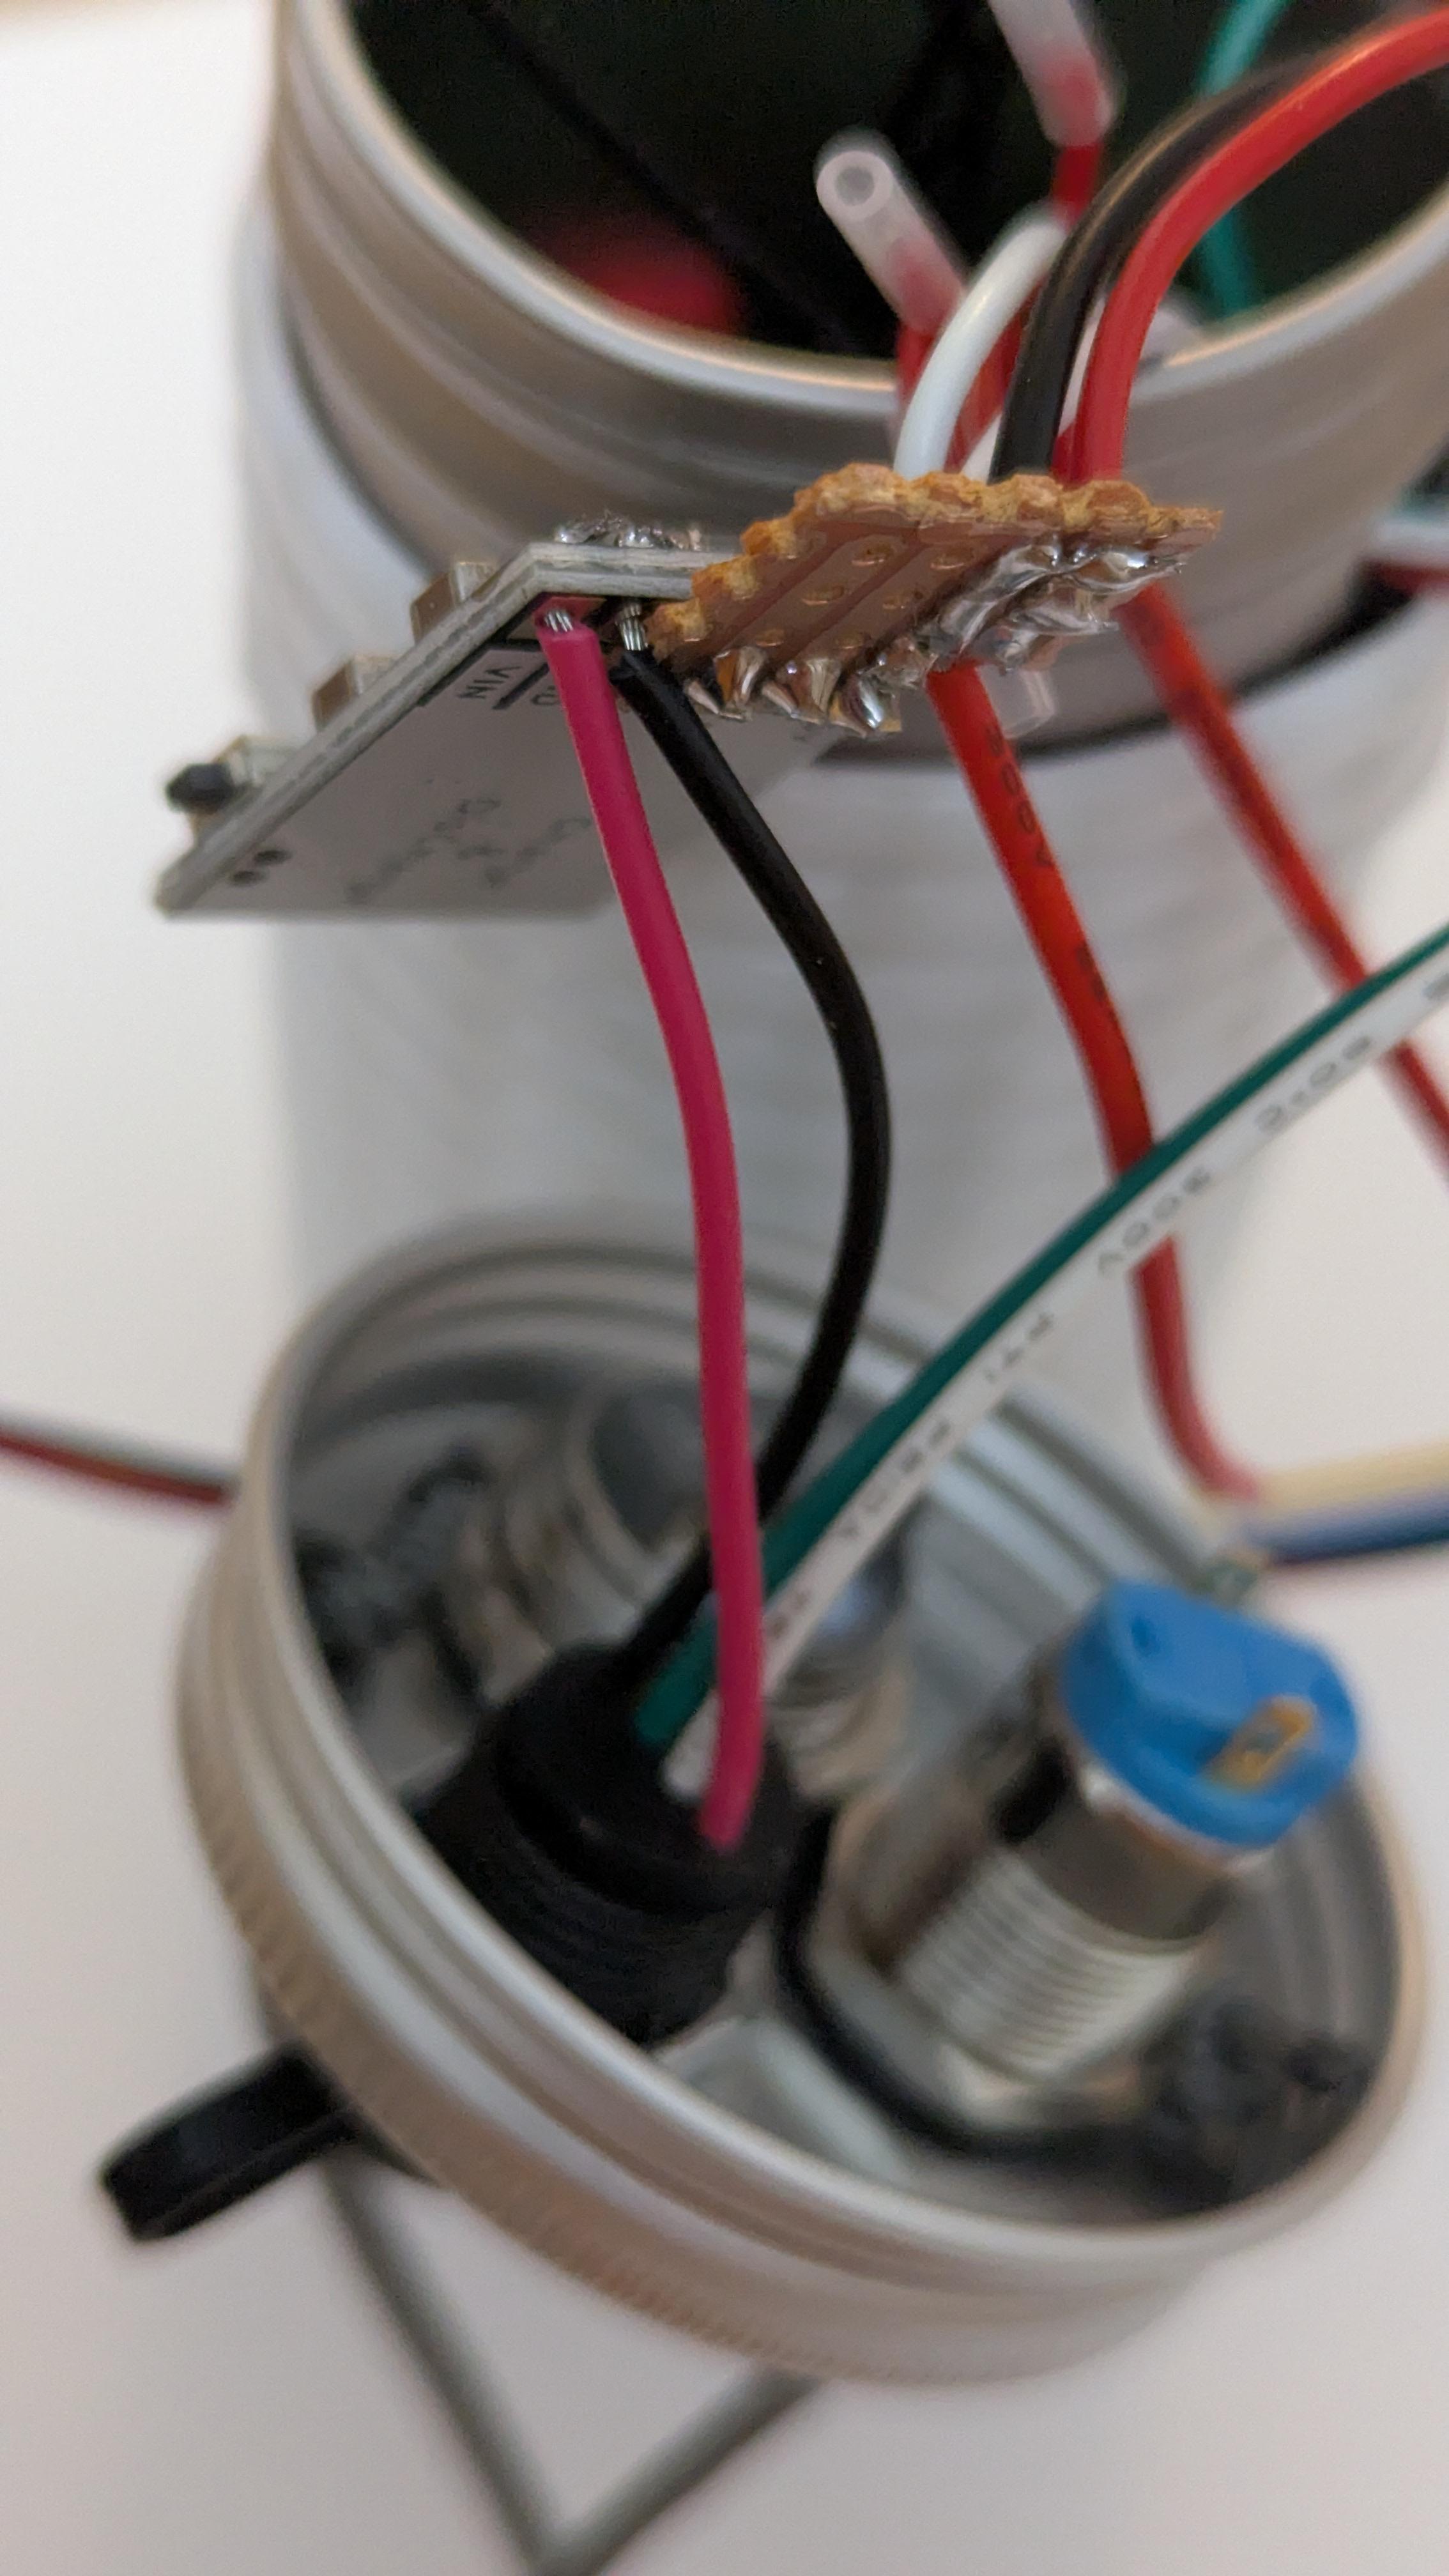
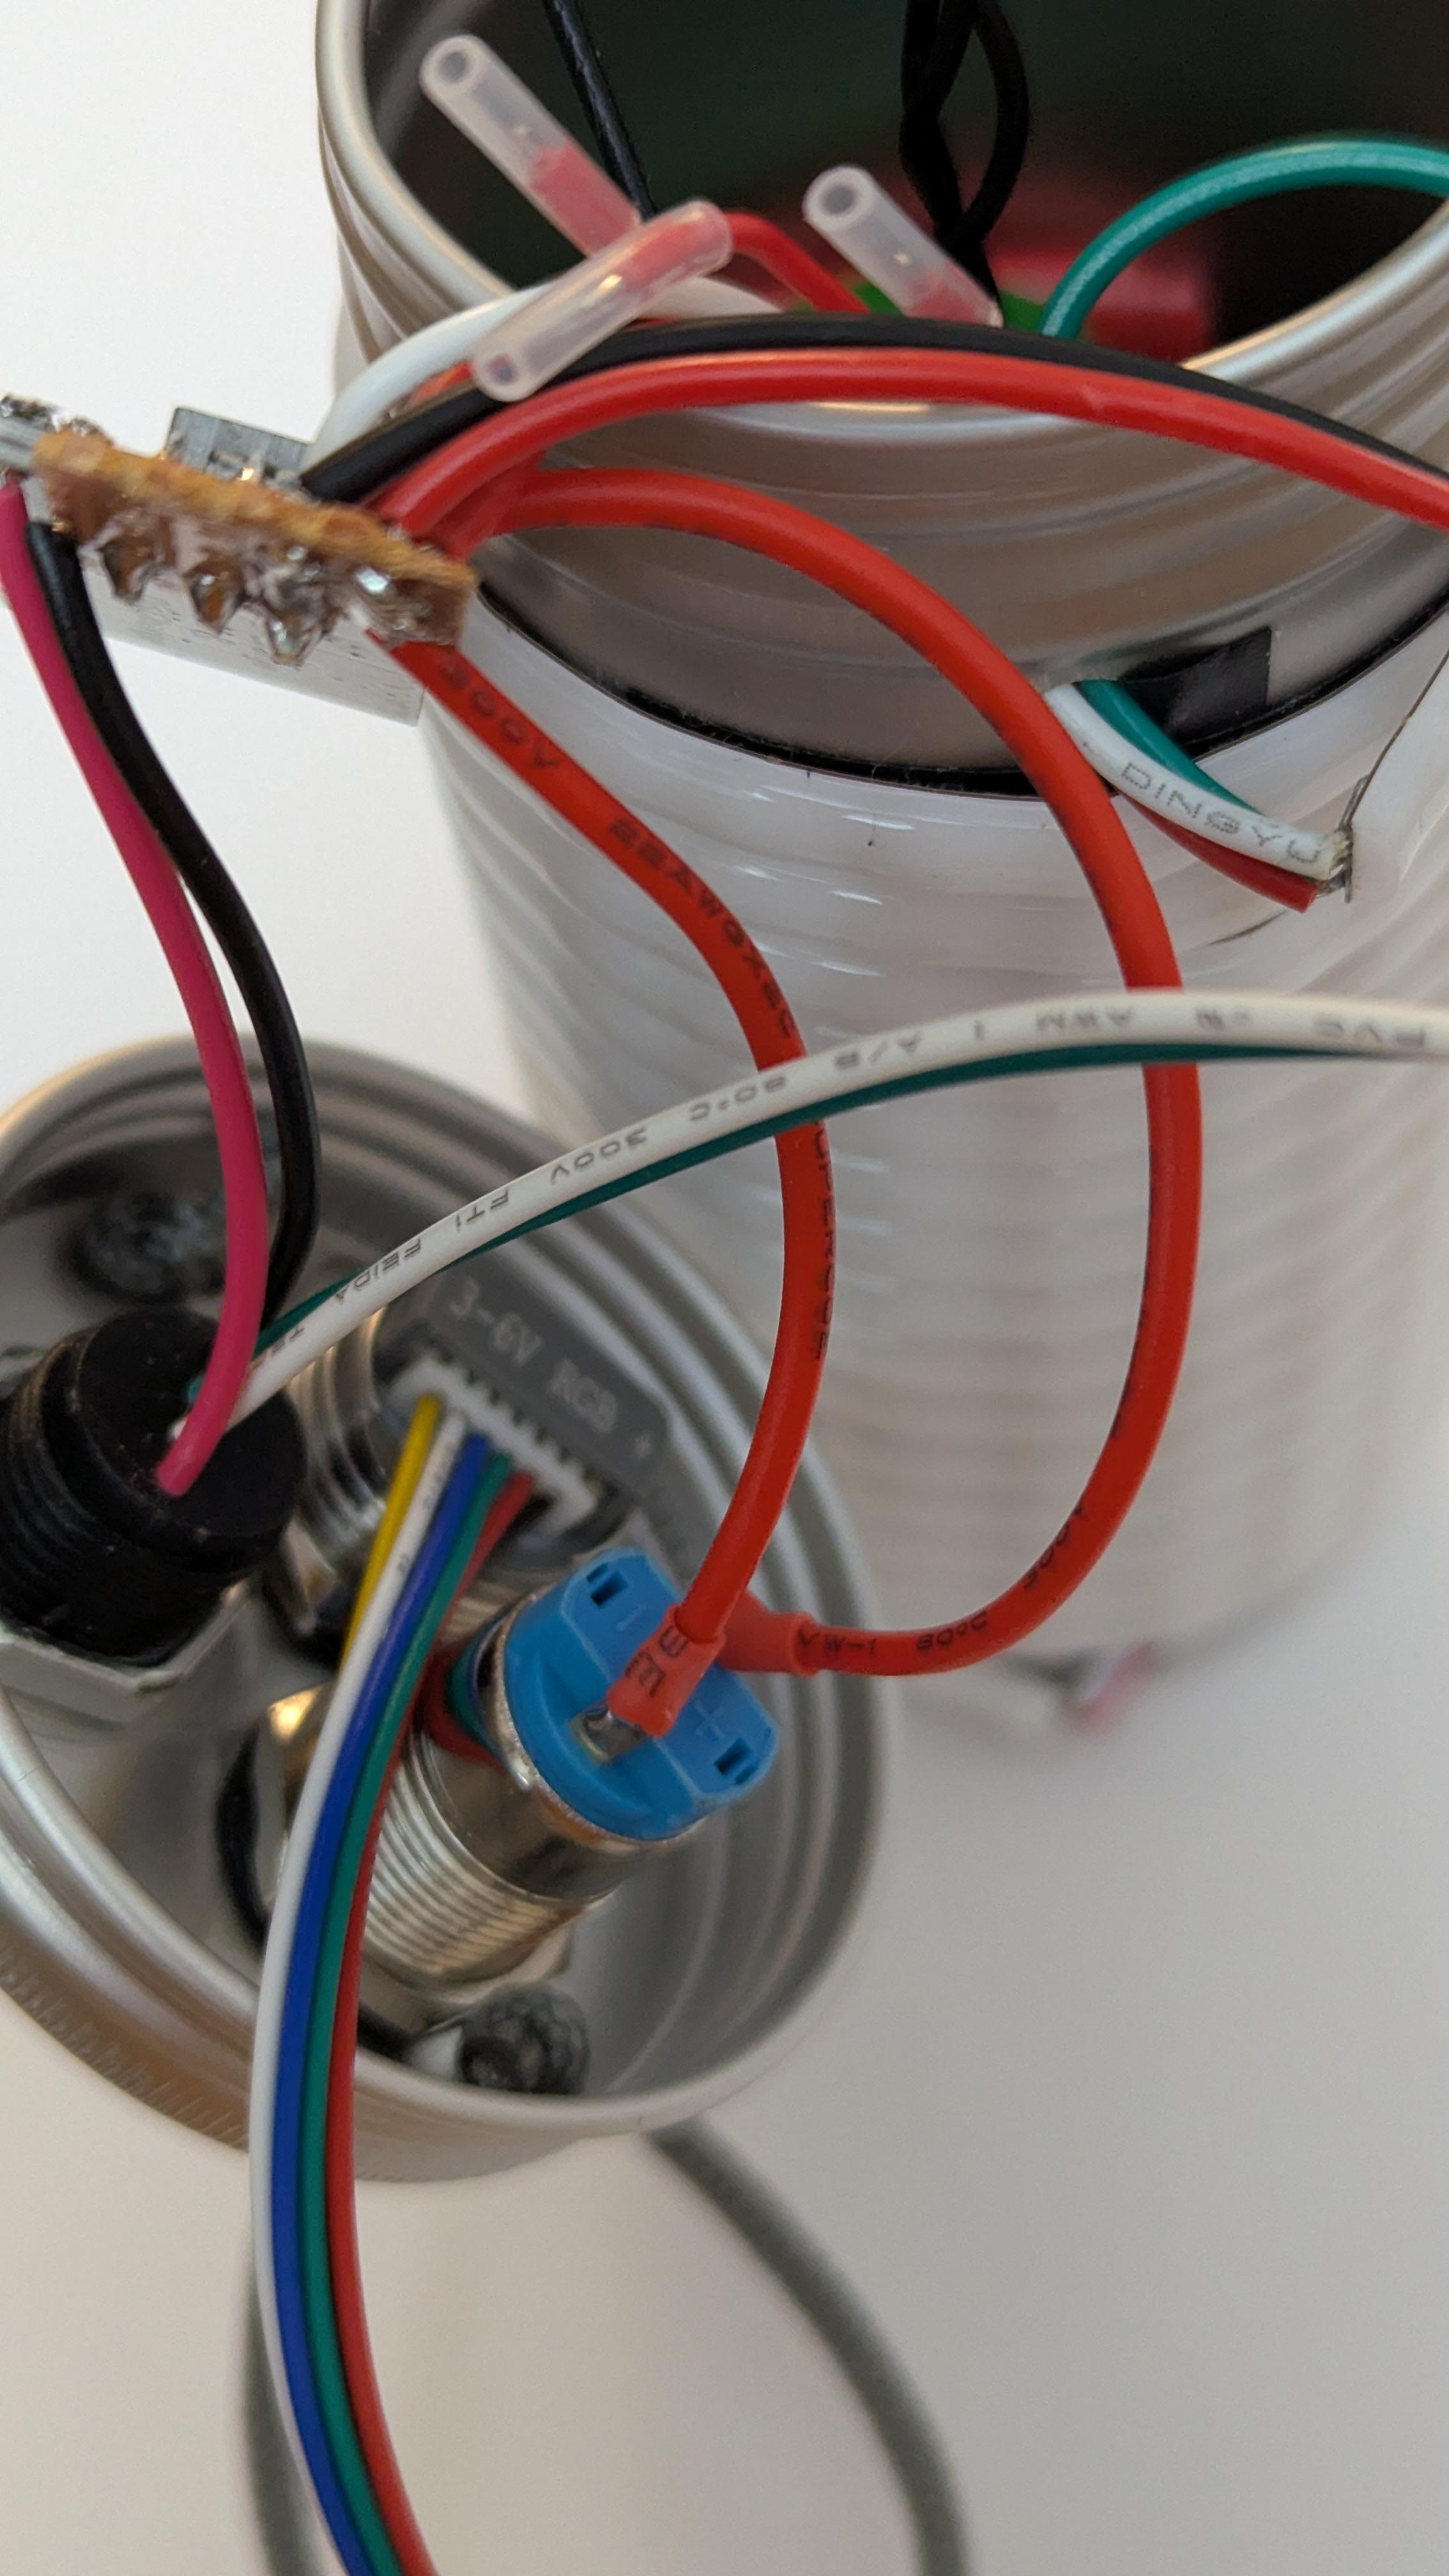
Solder batteries to perfboard. Be careful not to create shorts with the iron.
Final steps
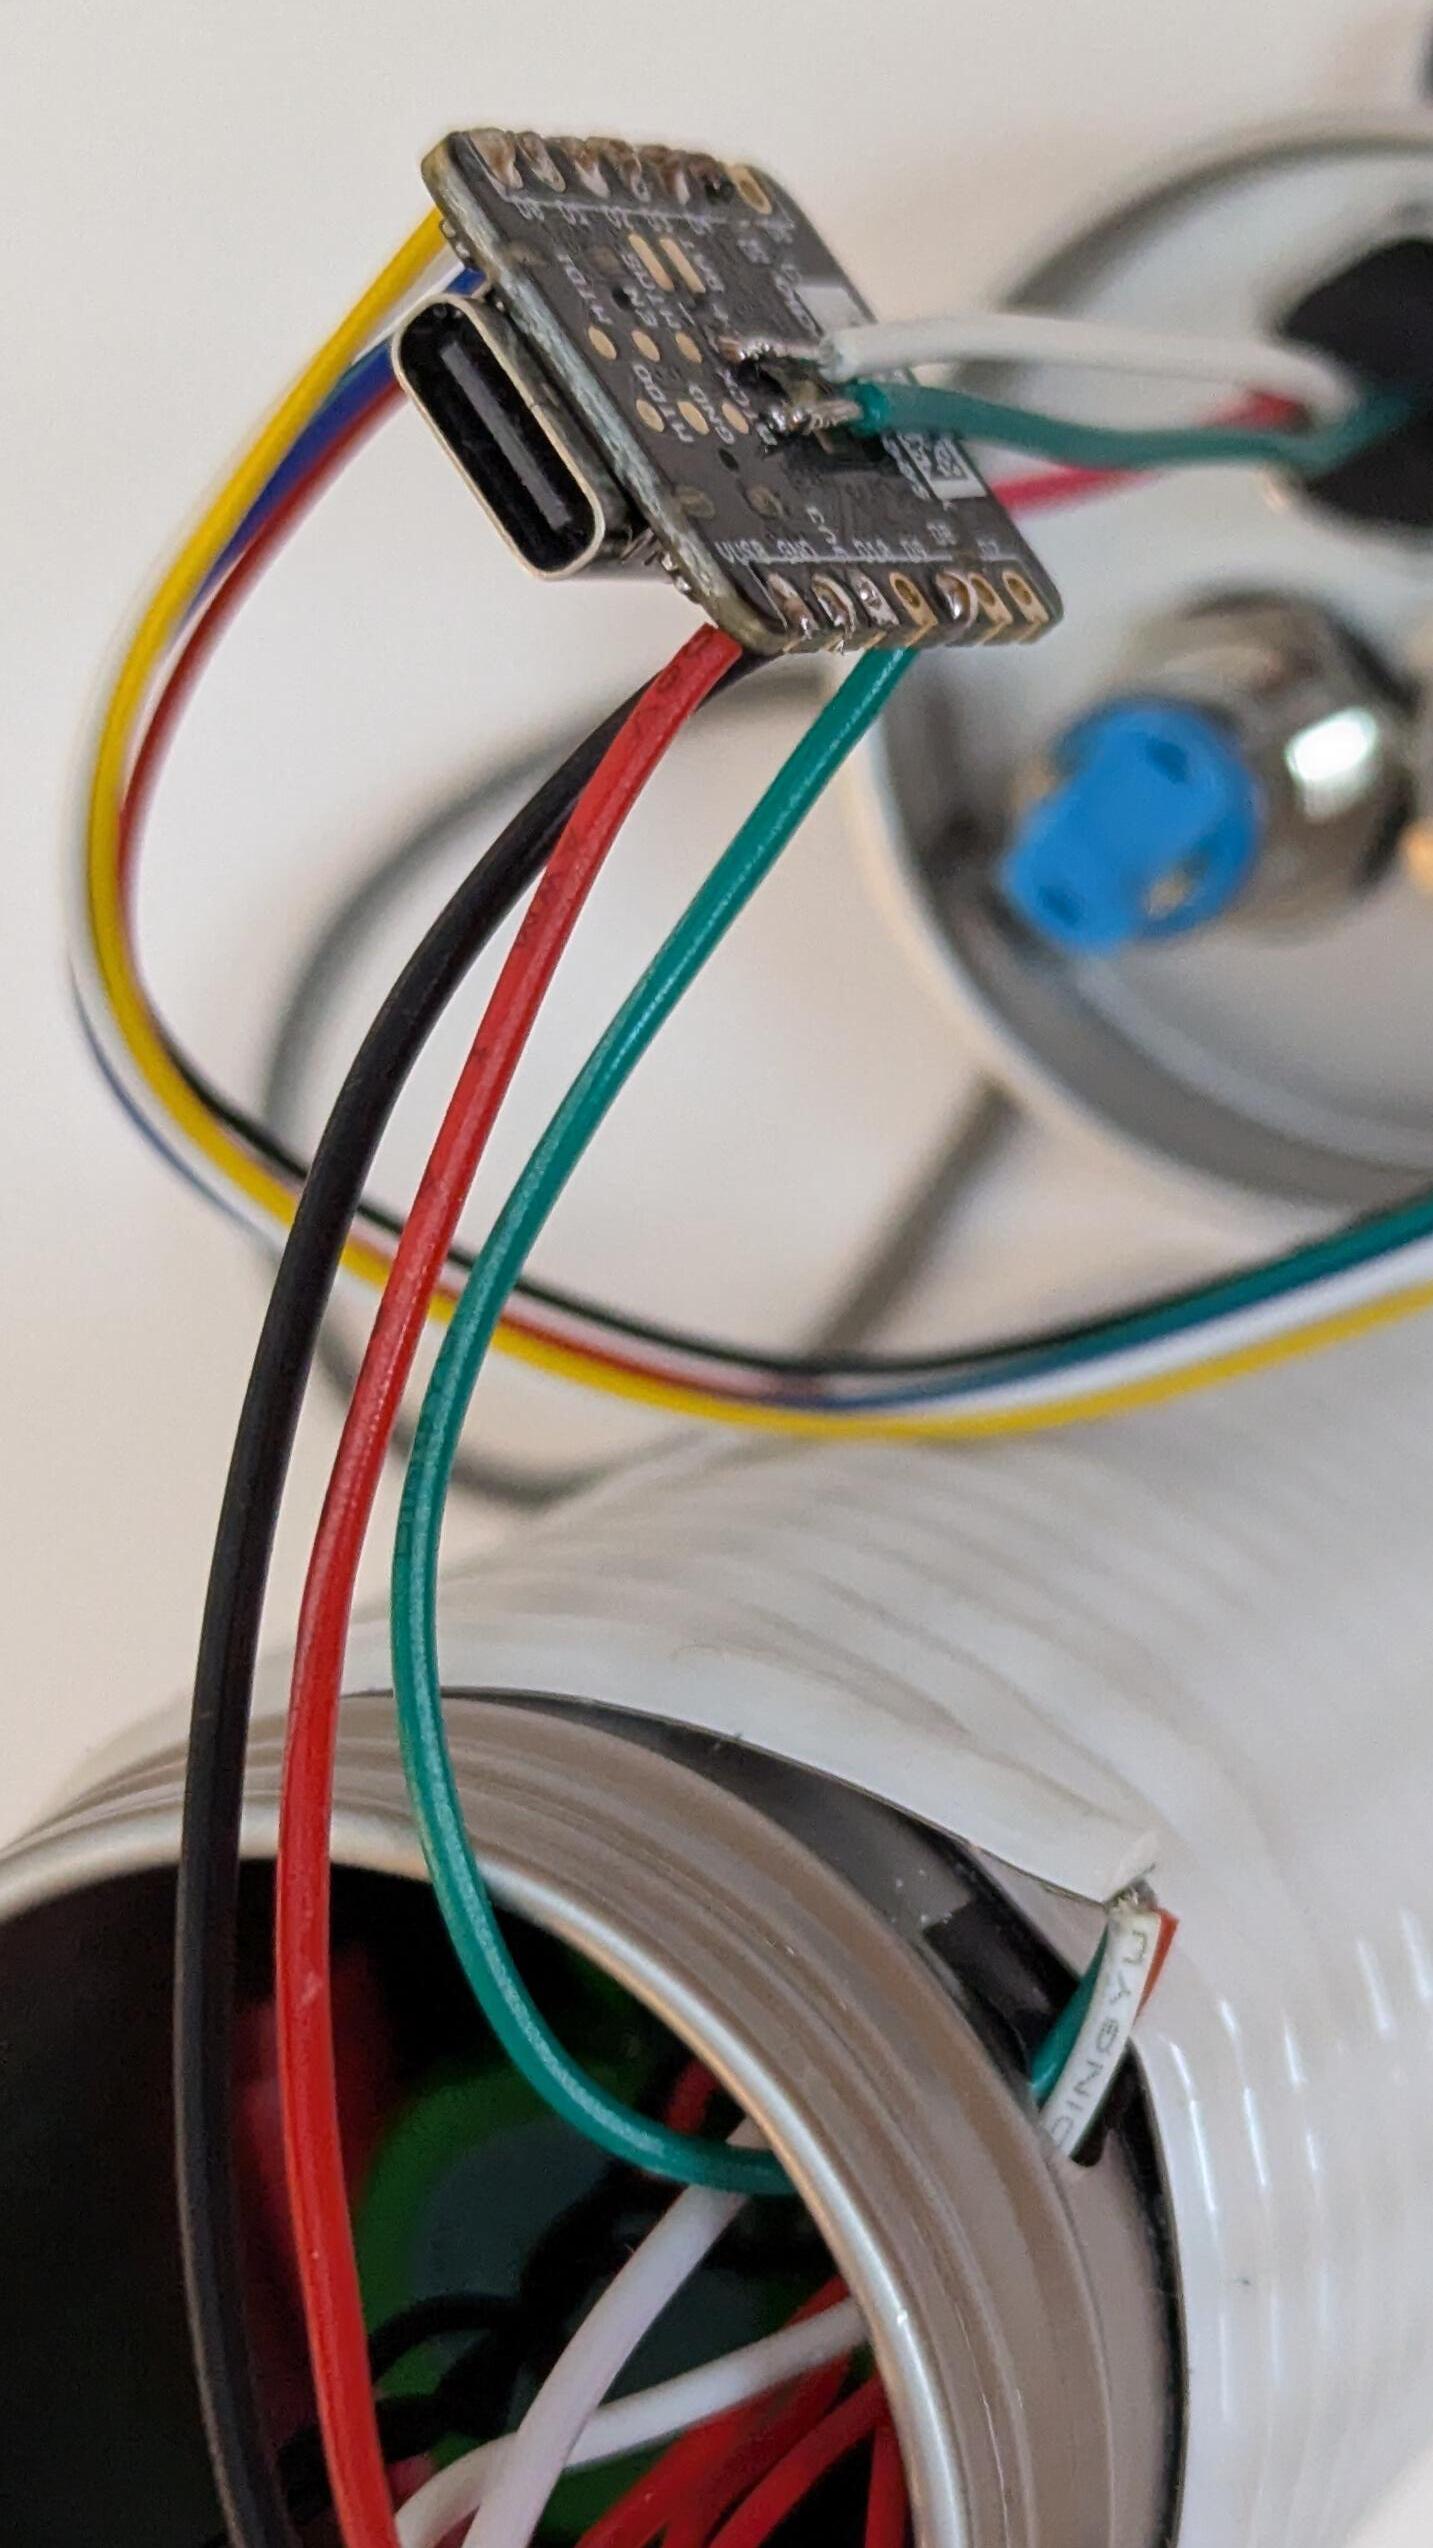
Connect the antenna to ESP32.
Check everything works: the lamp turns on when the power button is pressed, it changes color when the other button is pressed, and when plugged to a computer, the ESP32 is detected and the charging LED blinks.
Close the box
This step is not as easy as it looks, since there is not that much room.
To save up space, slide the ESP32 to the side of the batteries, so that it is sandwiched between them and the tube.
Slowly and carefully close the box.
Optional: secure the cap
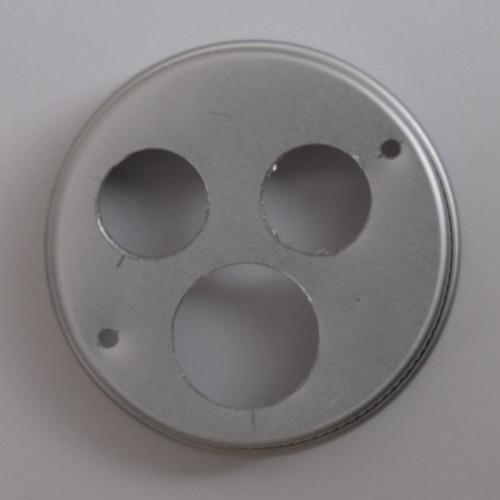
If the lamp is going to be hung from a backpack while walking, one useful extra step is to secure the cap so it can't turn and open accidentally.
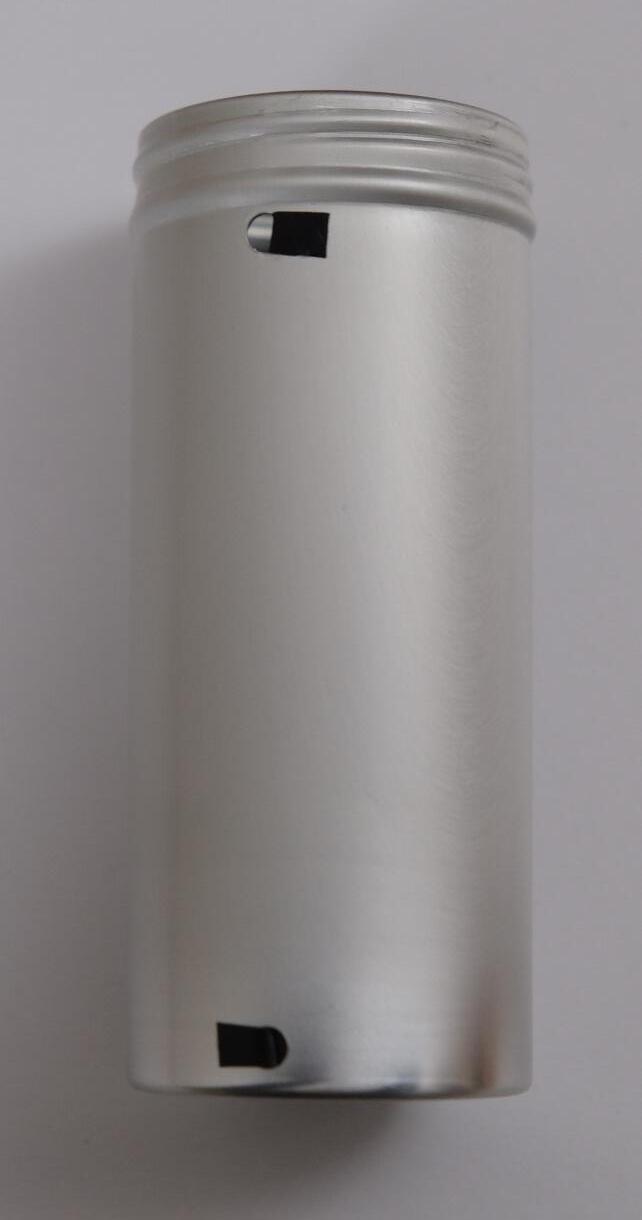
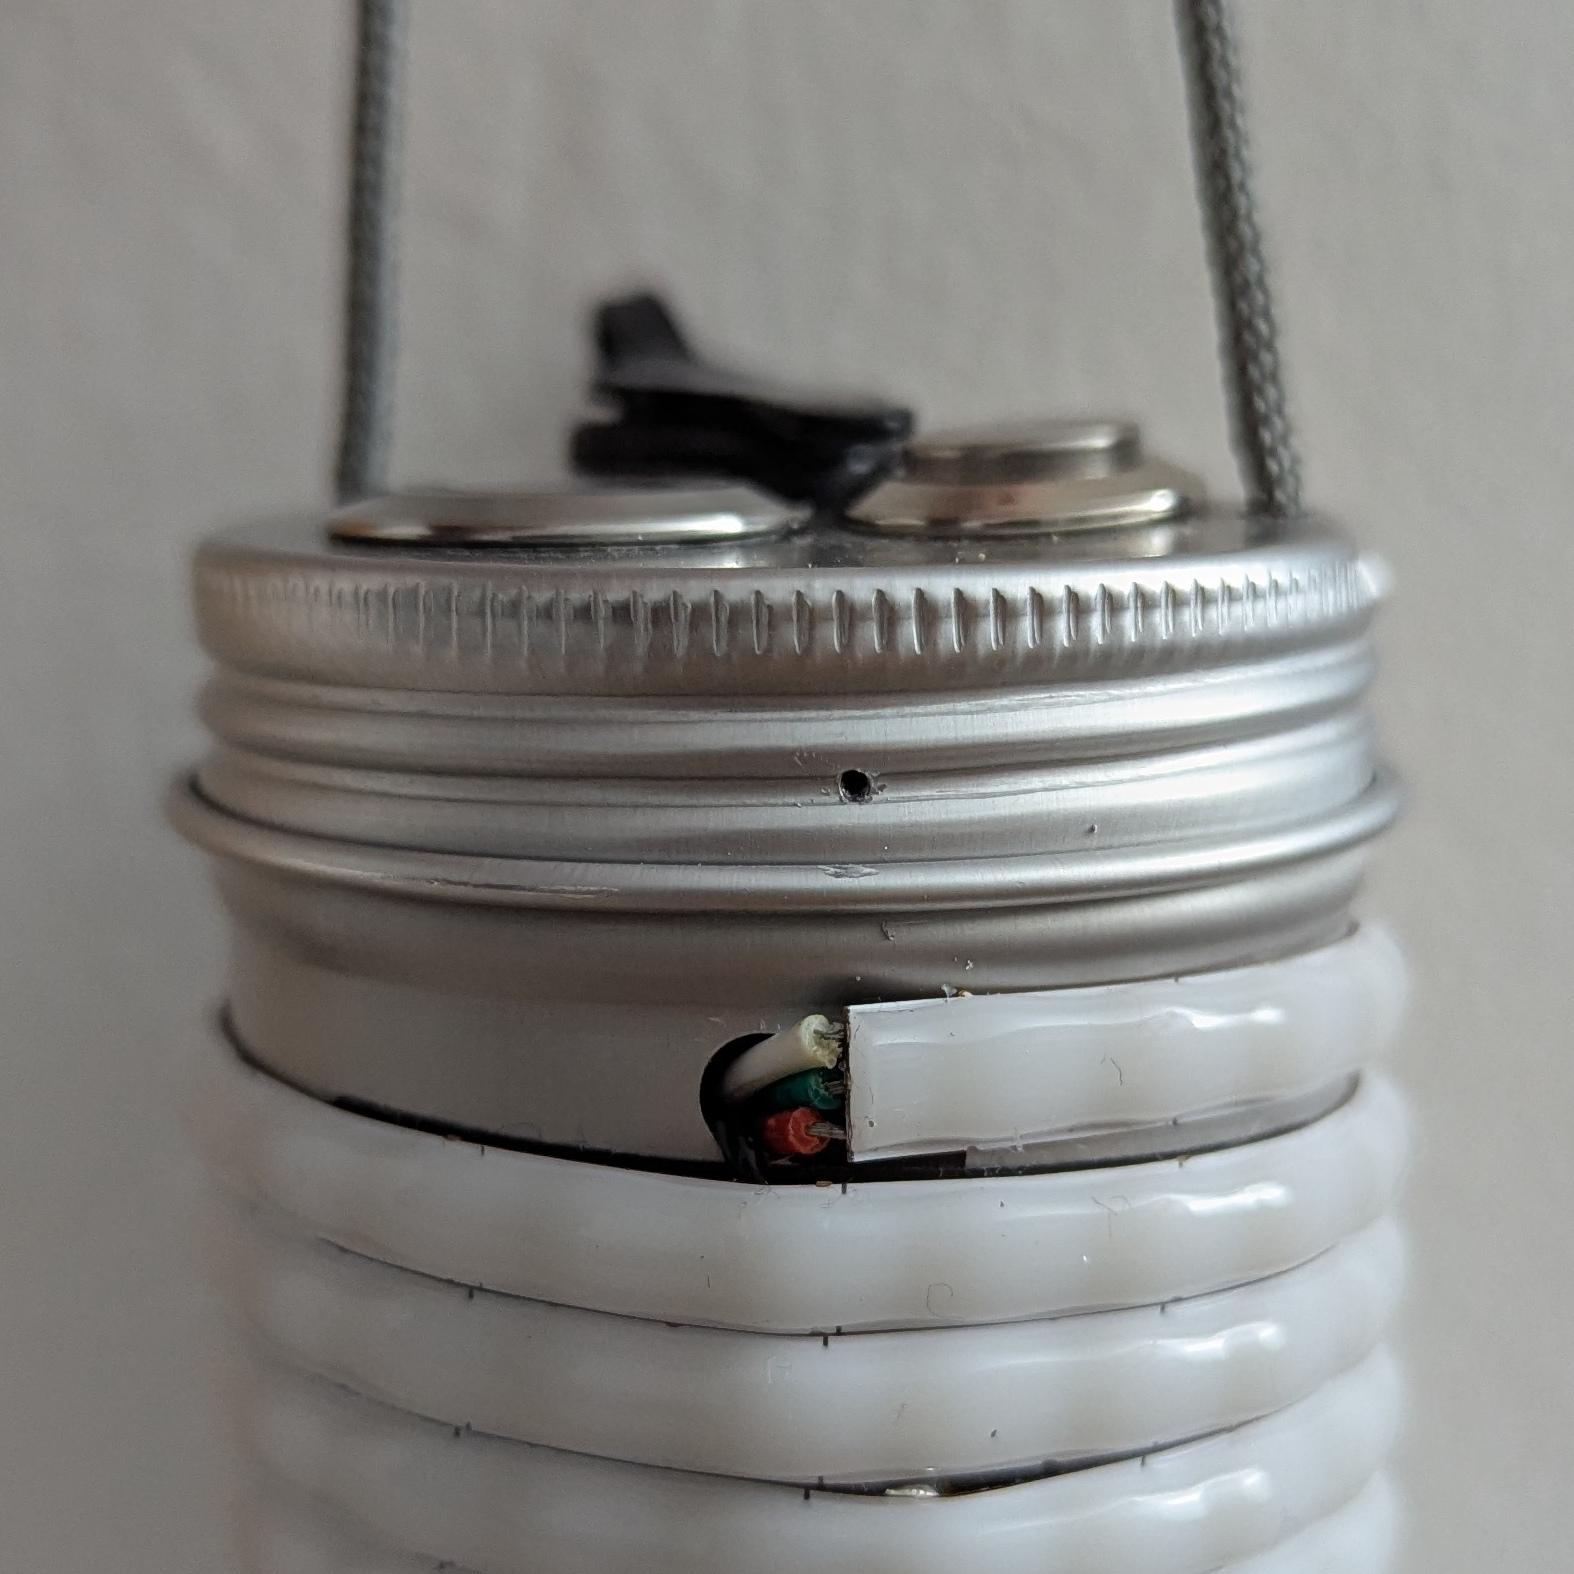
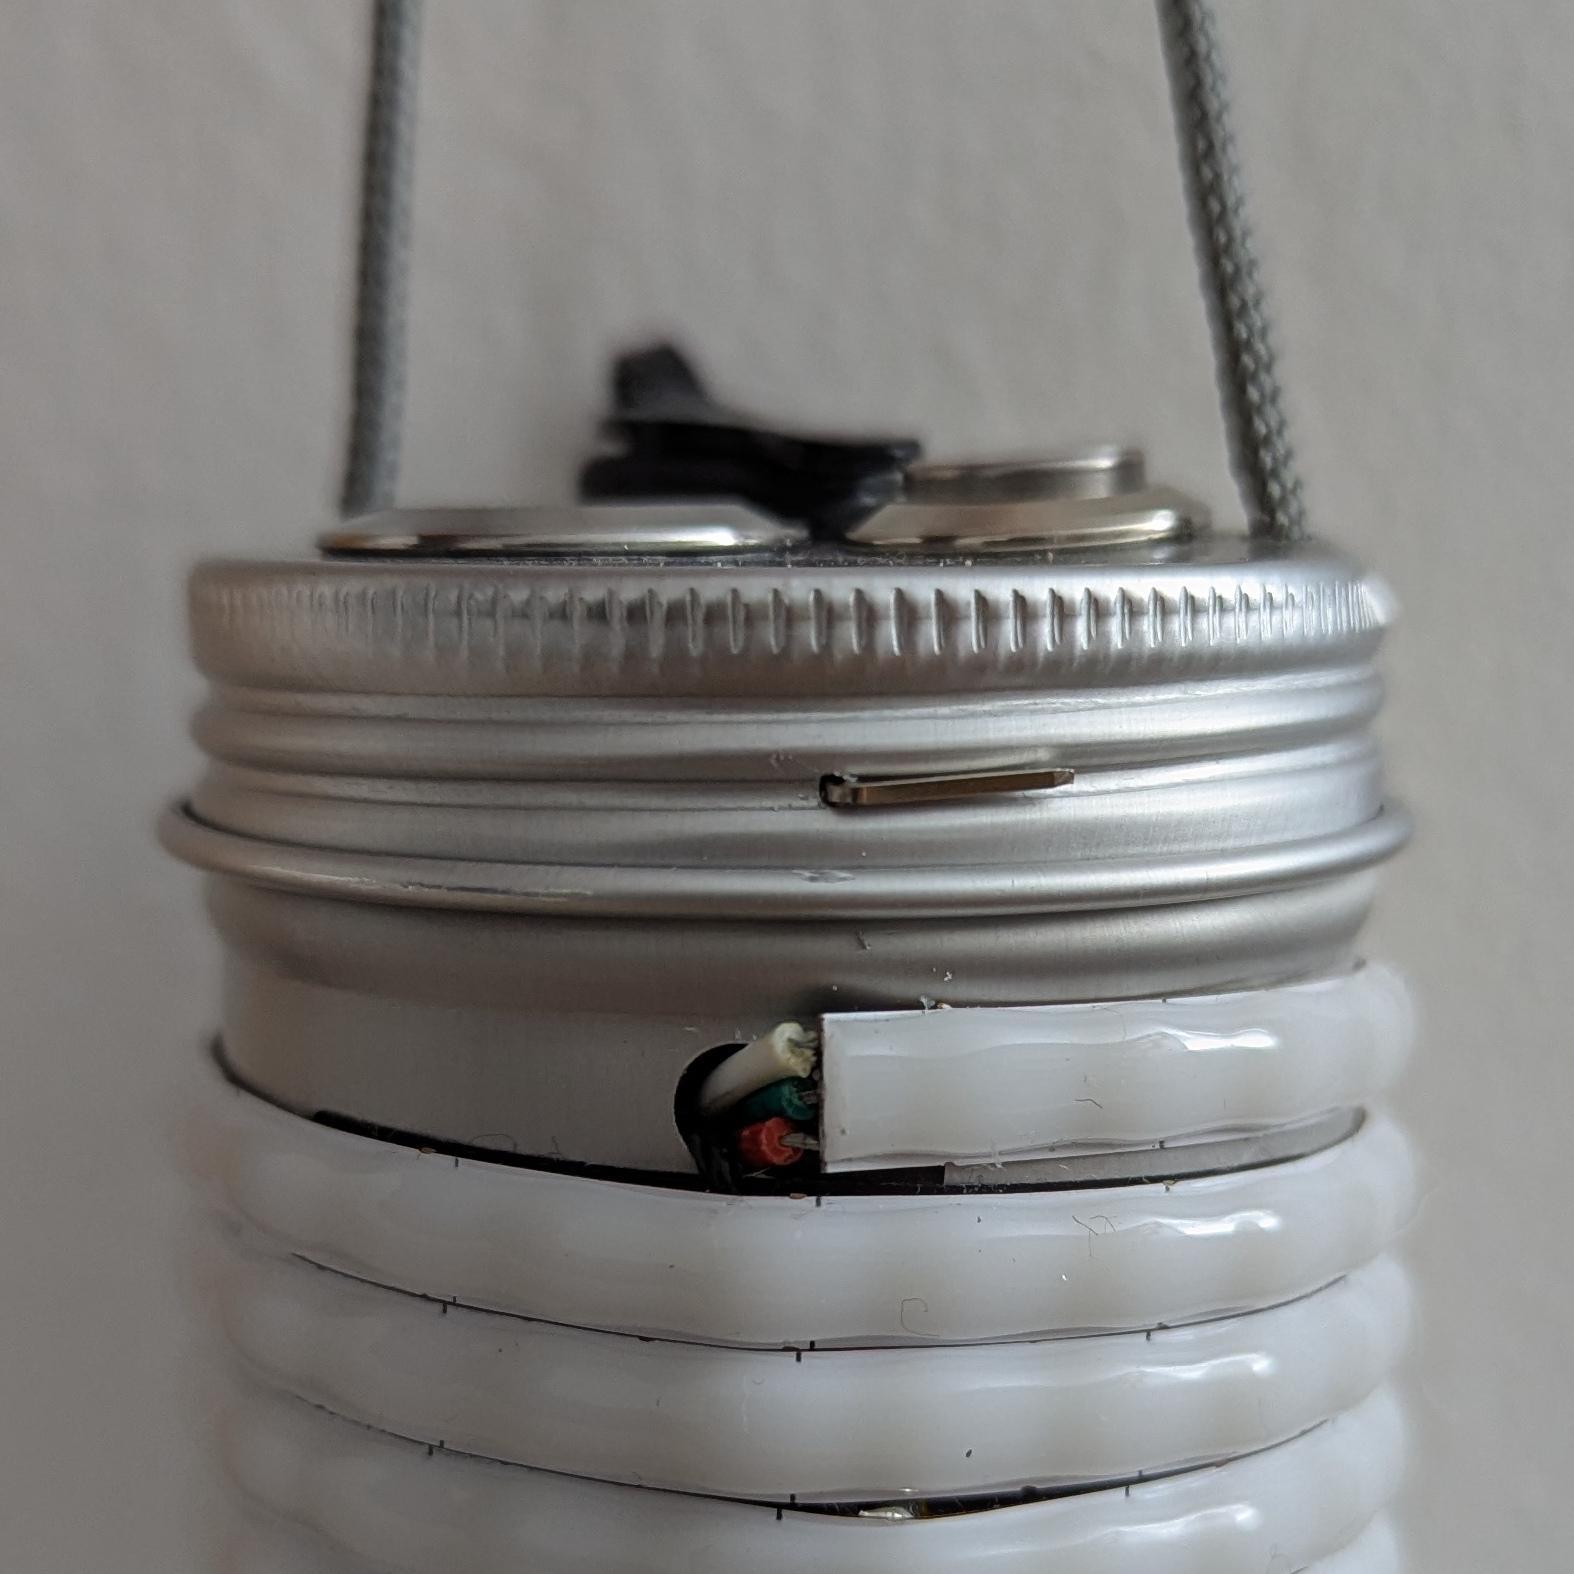
Drill a small hole and insert a bent header pin into it, which can then be glued or held in place by the heat-shrink tubing of the next step.
Add heat-shrink tubing
Cut a piece of heat-shrink tubing the same length as the box.
-
Put the box inside it.
-
Using any source of heat, shrink it in place.
All done! Enjoy the lights ✨